
|
|
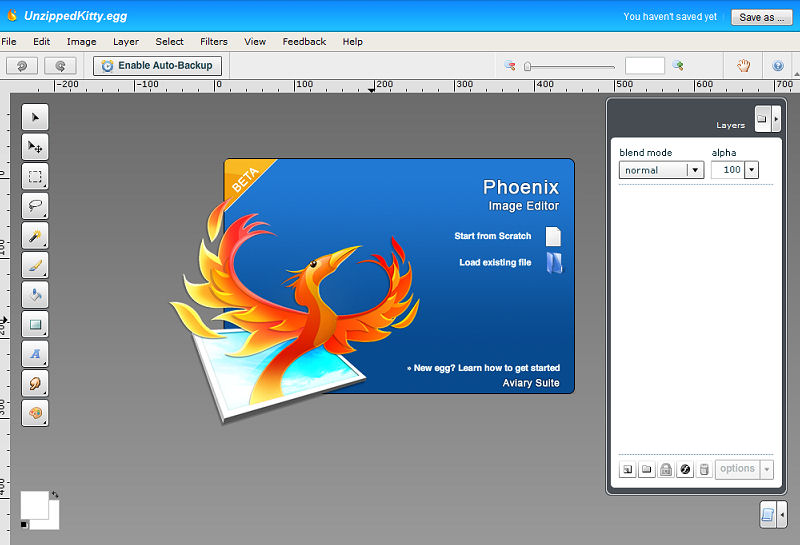
Aviary is a unique collection of online tools you can use to create a caption and it's free! Check out the homapge here. Aviary Phoenix is the graphic editing portion of the tool set. What's particularly cool is that you don't have to download any software on your computer because it runs in your web browser. There are other portions, but for the below tutorial, we'll be dealing with the Phoenix portion of the program. |
 Once you have launched the Phoenix Image Editor on Avairay.com, select "New Document" from the "File" dropdown menu at the top of the screen. |
 On this screen you are given 2 options... "Start from Scratch", and "Load existing file". Select "Start from Scratch". |
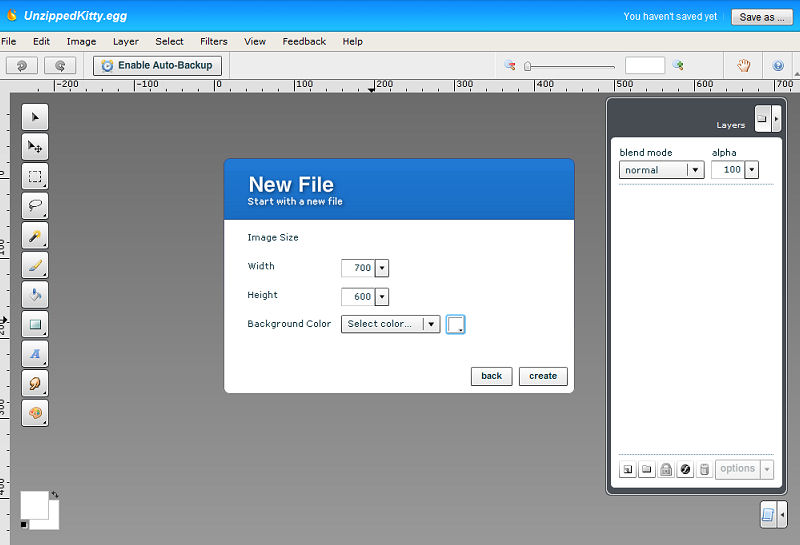 Here you will need to set up the canvas for your new caption. You want the size to be something manageable, a good choice is 700 width and 600 height. Then select a background color... for this example we chose white for good contrast. Once you are happy with your selections, click "create". |
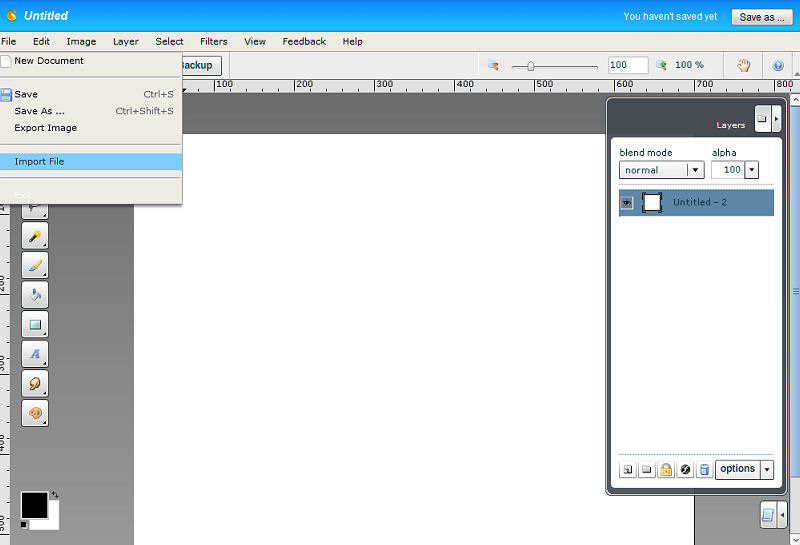 You will be greeted by a blank canvas, set to your specifications. Now we can import the image we wish to caption. Select "Import File" from the "File" dropdown menu at the top of the screen. |
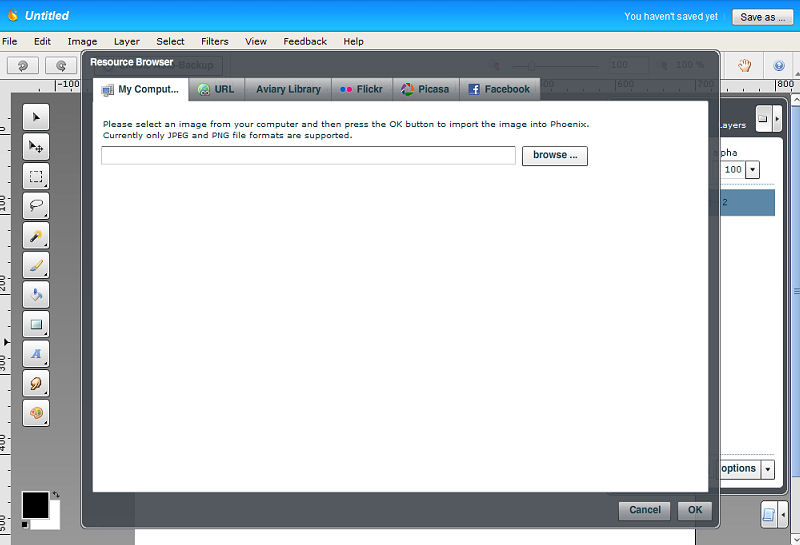 Here you are given a multitude of places in which you can upload your image from, in this case we will select an image from our hard drive. So from the "My Computer" tab, we will either type in the location of the image or click "browse" and select the image. |
 The image will now be loaded into the project on a new layer starting in the upper left hand corner. We will want to move this to center it o our canvas. To do this, select the "Move Tool" from the quick tool icons going down the left hand side of the screen. It is the top one that looks like a pointer. |
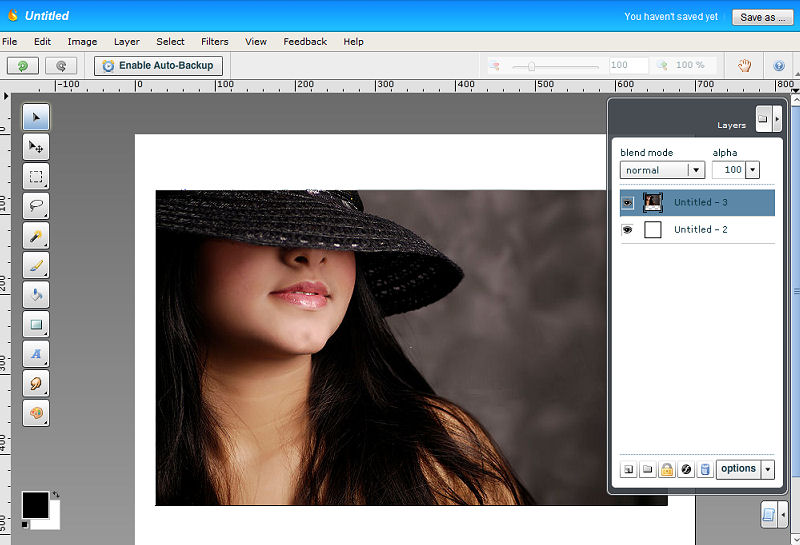 Click on the image and hold the mouse button down and drag the image to the desired location and release the mouse button. |
 Now we can add a title if it is desired. Select the "Text Tool" from the quick tool icons going down the left hand side of the screen. It is the one that looks like a capital "A". A dialogue box will pop up... select a size for your text, we want a title to be large so change 16 to 44. Click on the image where you would like to start the text. |
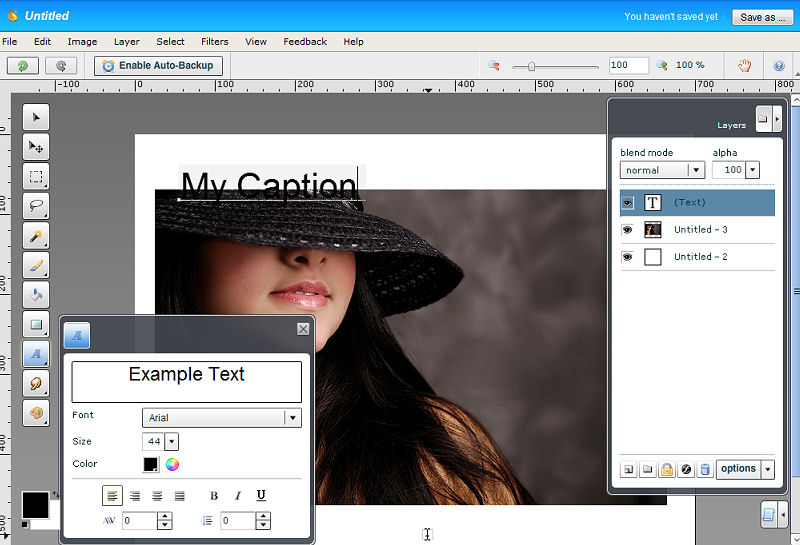 Now type your title, it will appear on the screen as you type. Don't worry if it isn't in the exact spot you want... it is on it's own layer and can be moved easily. |
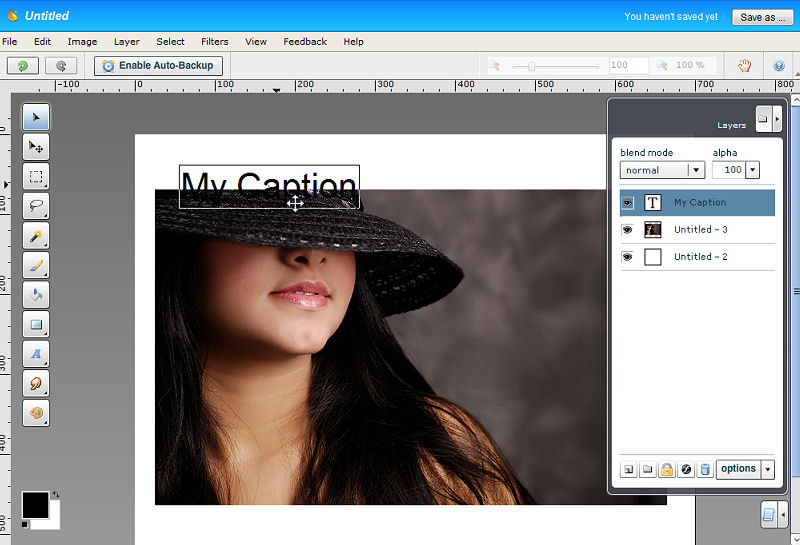 Select the "Move Tool" from the quick tool icons again and click and drag the text to where you want it. |
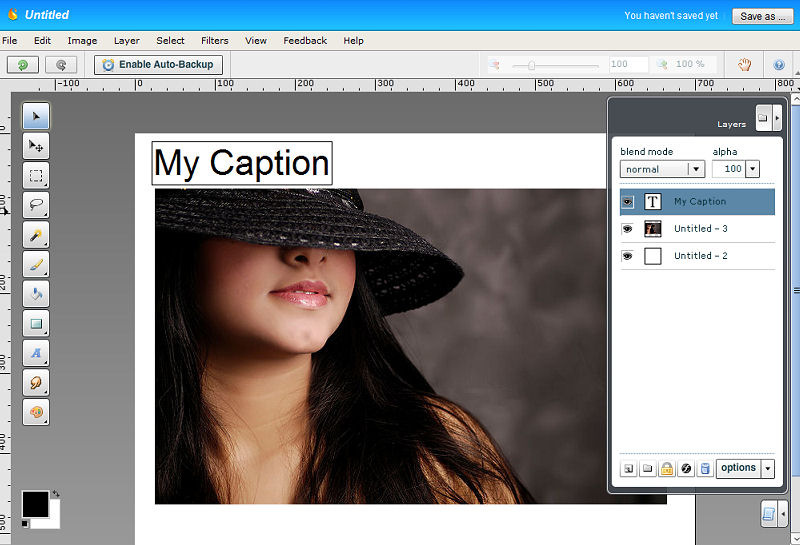 Now we have a titled picture on a canvas with plenty of space below to put our caption text. We will need to create a new layer for the caption text to live on so that we can manipulate it separately from the title text. |
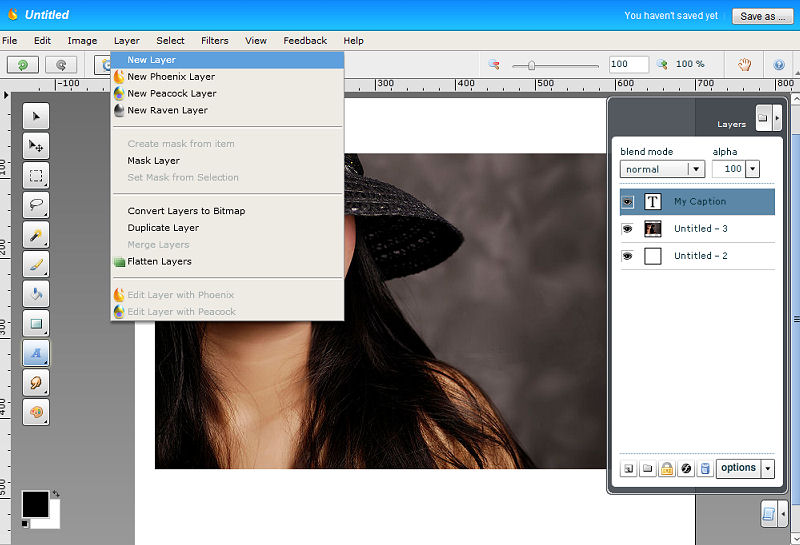 To accomplish this we will select "New Layer" from the "Layer" dropdown menu at the top of the screen. |
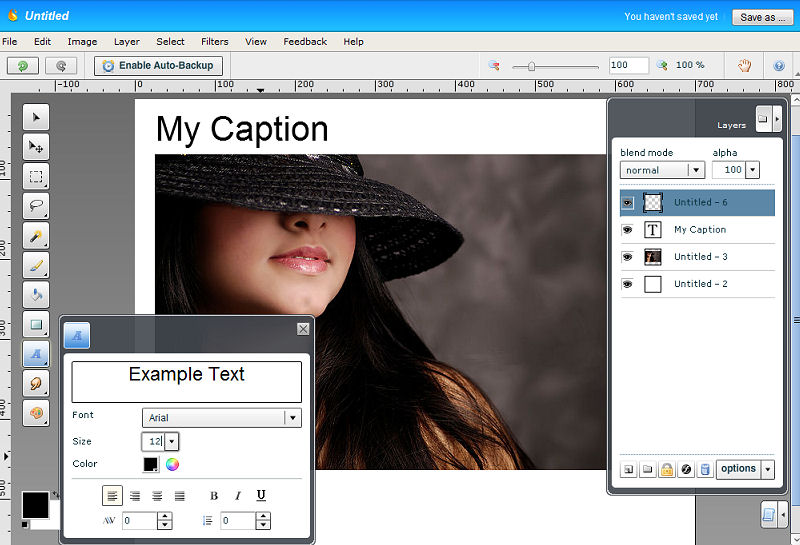 Now that we have the new layer we can add the caption text. Select the "Text Tool" again and set the size to 12 and click on the canvas approximately where you want the text. Type in your caption text. |
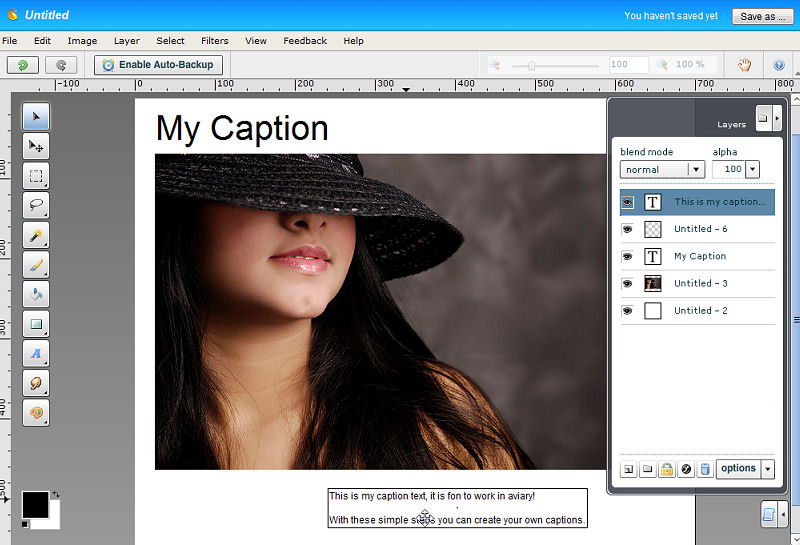 Select the "Move Tool" again and click and drag the caption text into position. |
 Now we can preview our finished work. If you are satisfied with it, we can save the caption as a finished image to our hard drive. |
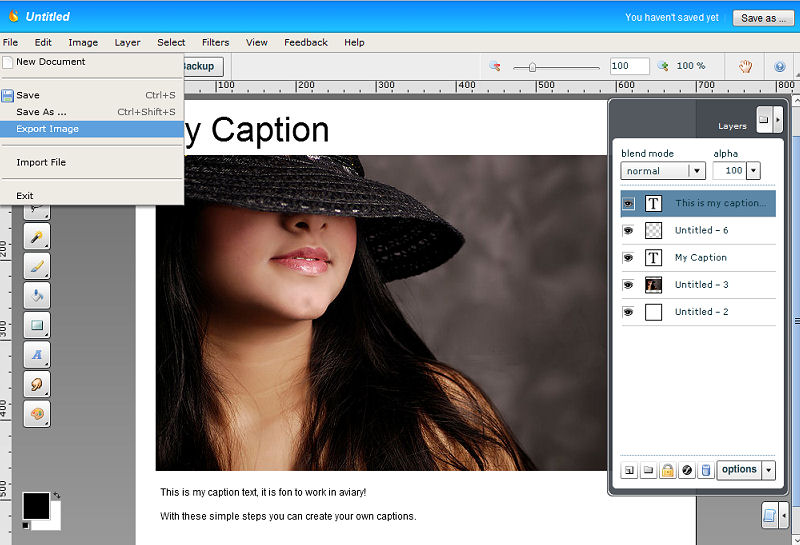 Select "Export Image" from the "File" dropdown menu at the top of the screen. |
 Select "JPG" as the file type and click "generate image". |
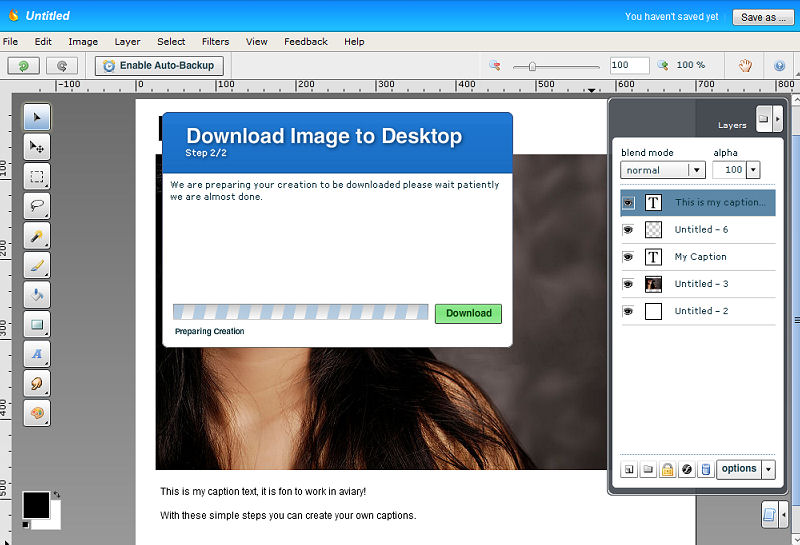 The caption is now generated and saved to your desktop. Couldn't be easier. |