|
|
Paint.net is freeware. It's a powerful graphic editor that is often used as a free alternative to Photoshop. It can do all the high-end editing tasks, has an array of plugins, and is widely supported by an online community. For a free download, click here. Below are just the basics that will help you make a really professional looking caption, but for more information on advanced techniques and access to forum to ask questions, click here. |
 |
 |
 |
 |
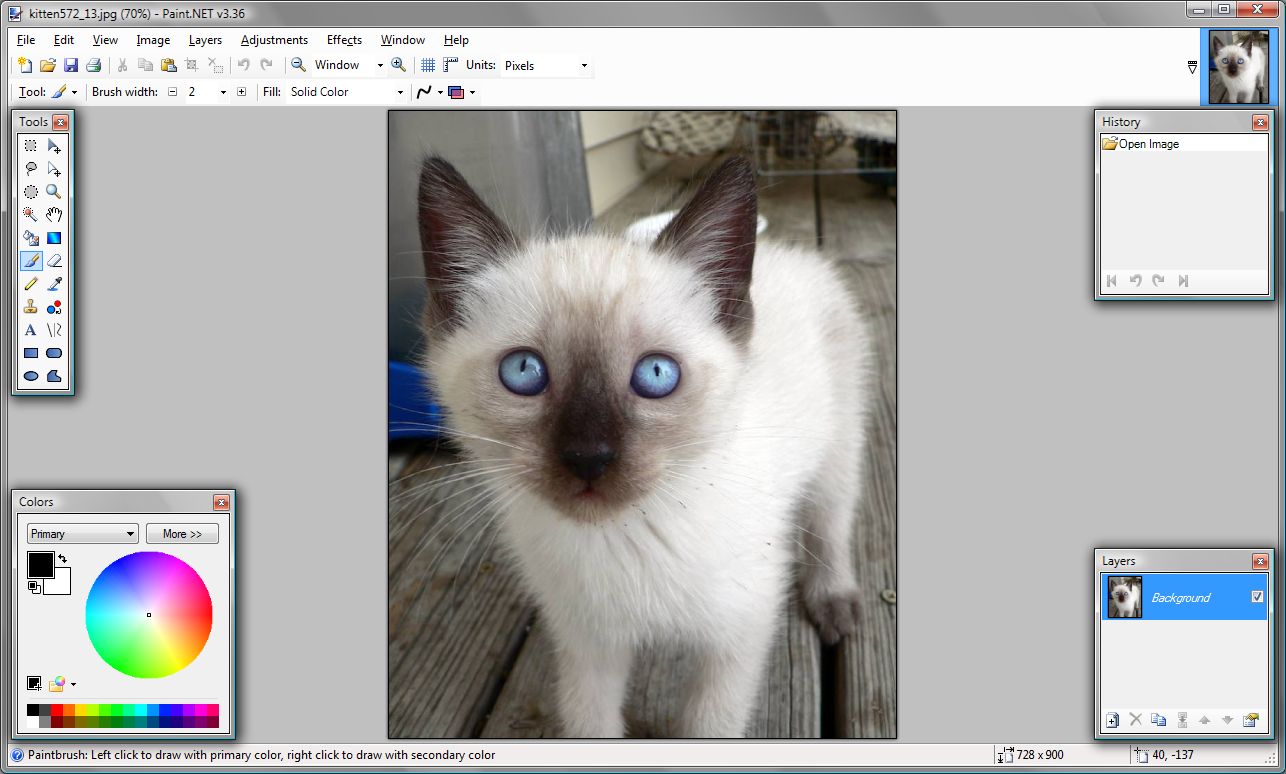
1) Open the original picture that you wish to caption in Paint.NET. The example image of the kitten is 728 pixels wide by 900 pixels high. In this tutorial, the final example caption will be 800 (pixels wide) by 600 (pixels high). It is important to determine the final caption size now, because resizing it later can produce strange visual artifacts and make the caption text difficult to read. If the image is smaller than the final caption size, jump ahead to step 5. |
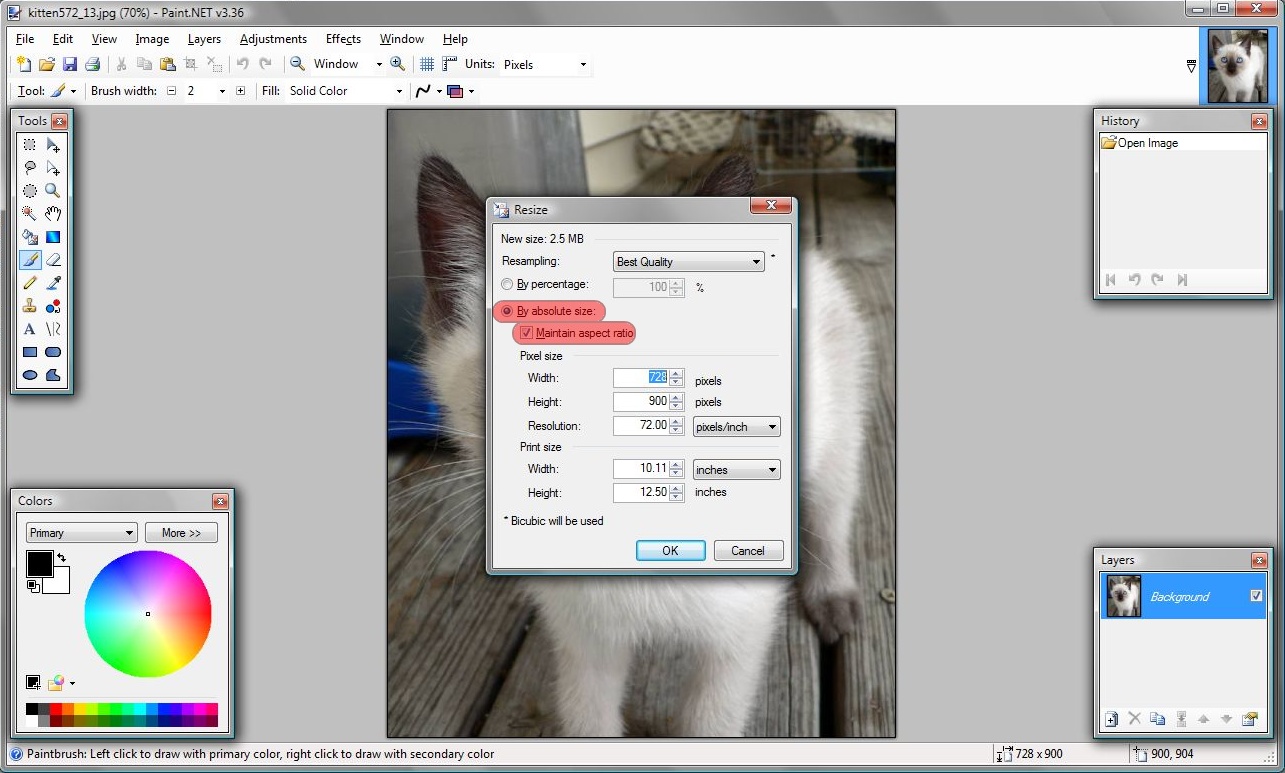
2) At the menu bar, click Image to display the drop-down menu. From the list, click Resize. |
3) At the Resize window, make sure the bullet next to By absolute size is selected. Click the checkbox next to Maintain aspect ratio if it is not already selected. |
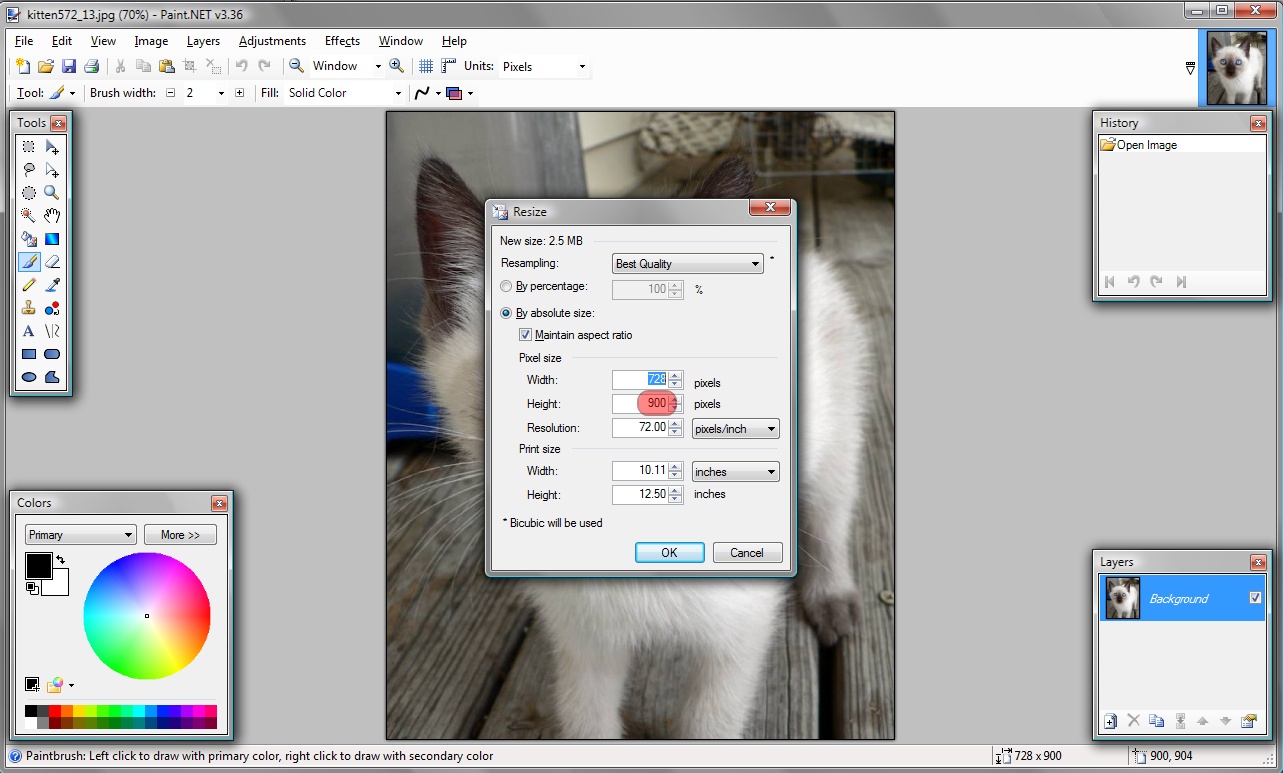
4) Next, in the Pixel size section, in the Height box, double-click the listed size (900 pixels in this example) to highlight it. Now type in 600 as the new height (in this example). The Width, listed above, will also reduce proportionally (to 485 in this example). Click OK to accept the changes. |
 |
 |
 |
 |
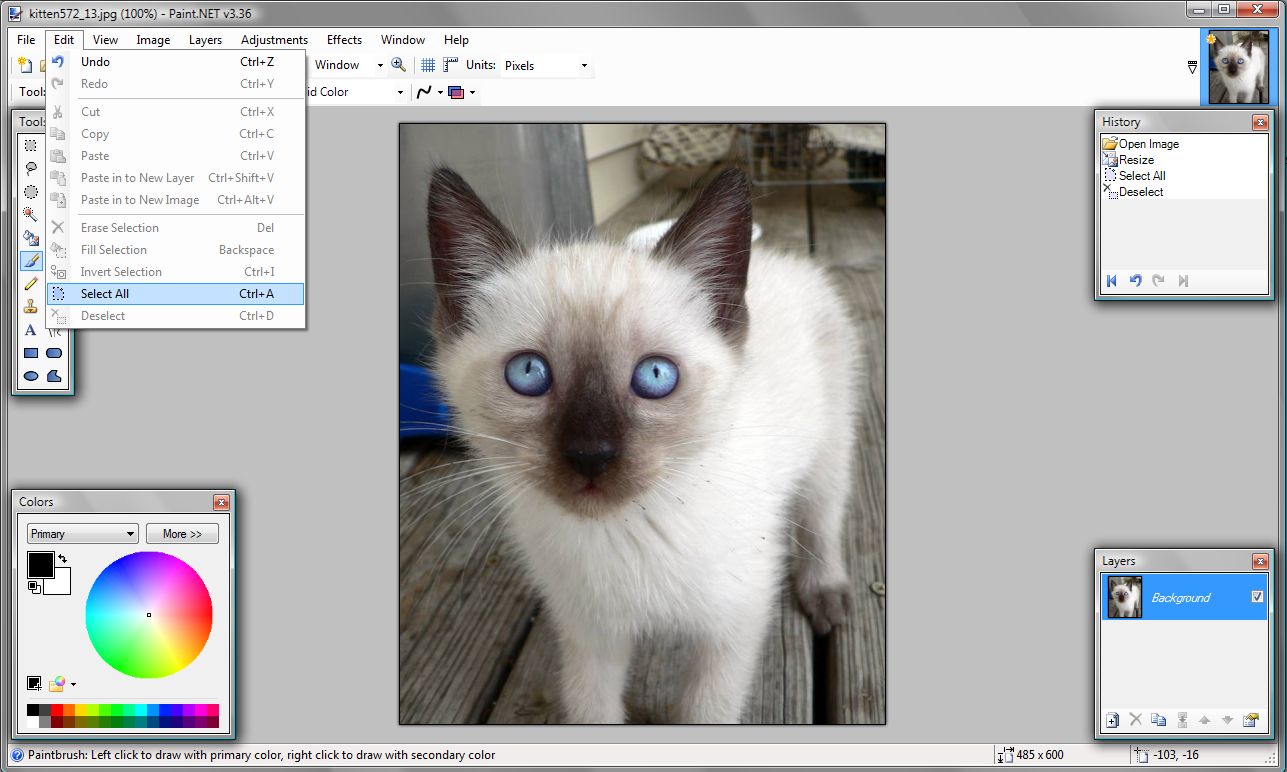
5) At the menu bar, click Edit to display the drop-down menu. From the list, click Select All. |
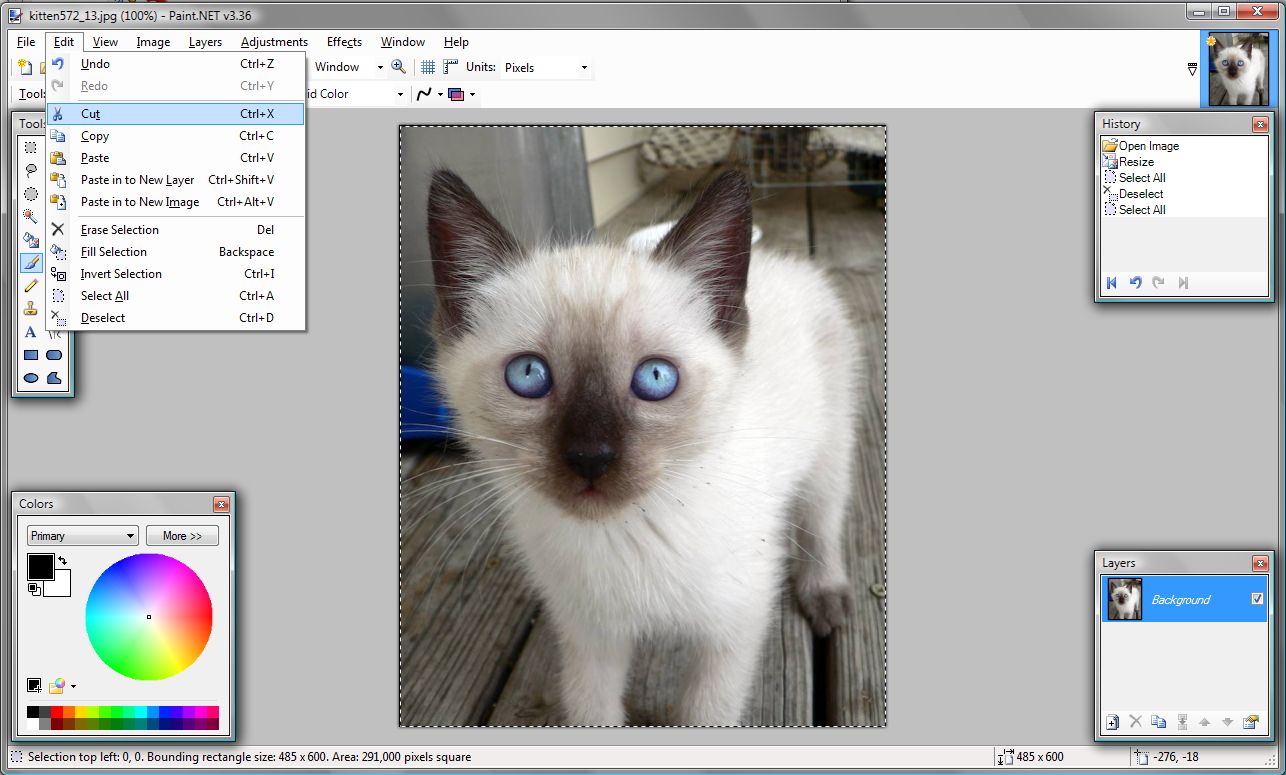
6) Again, at the menu bar, click Edit to display the drop-down menu. From the list, this time click Cut. This will temporarily move the image into the operating system Clipboard, leaving a clear canvas that can be resized without distorting the original image. |
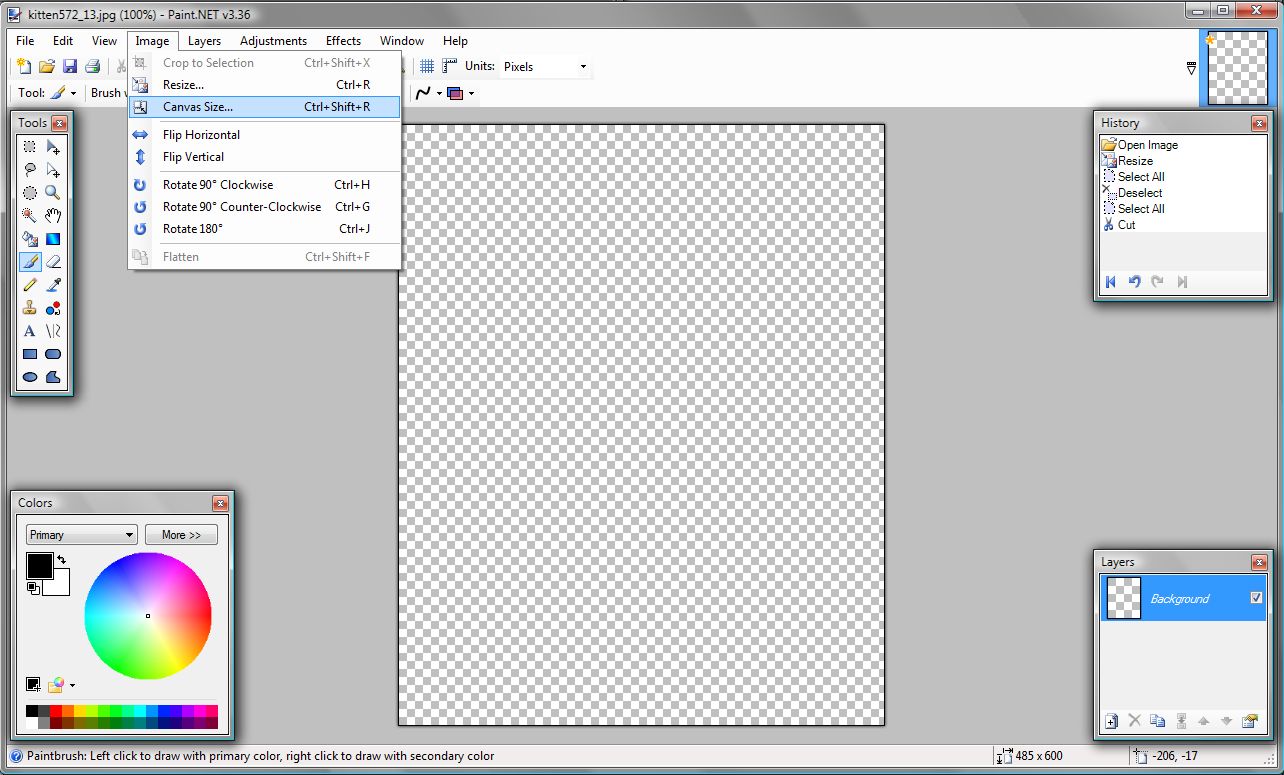
7) At the menu bar, click Image to display the drop-down menu. From the list, click Canvas Size. |
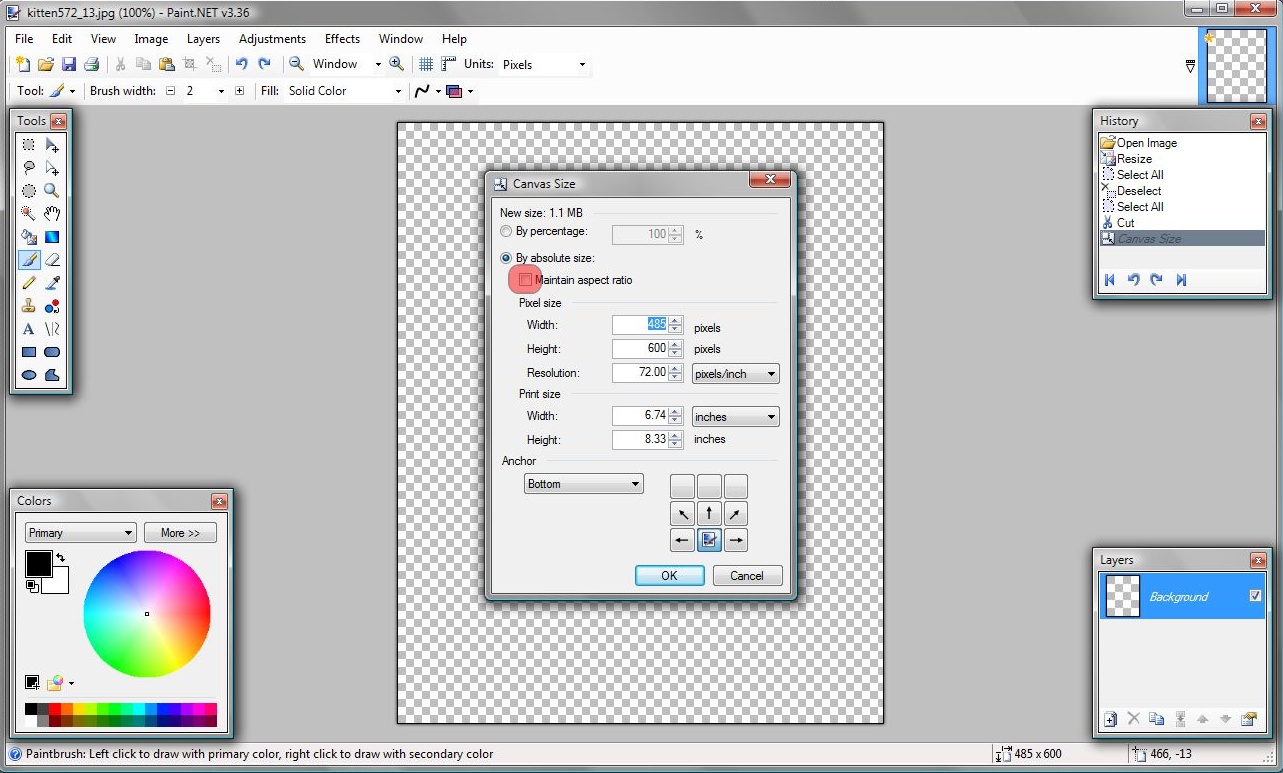
8) At the Resize window, click the checkbox next to Maintain aspect ratio to uncheck it. |
 |
 |
 |
 |
9) Next, in the Pixel size section, in the Width field, double-click the listed size (485 pixels in this example) to highlight it. Now type in the new width (800 in this example). In the Height field, the listed size (600 pixels in this example) is already correct. If the original image was shorter than the final size, it would need to be changed here to meet the desired final size. Click OK to accept the changes. |
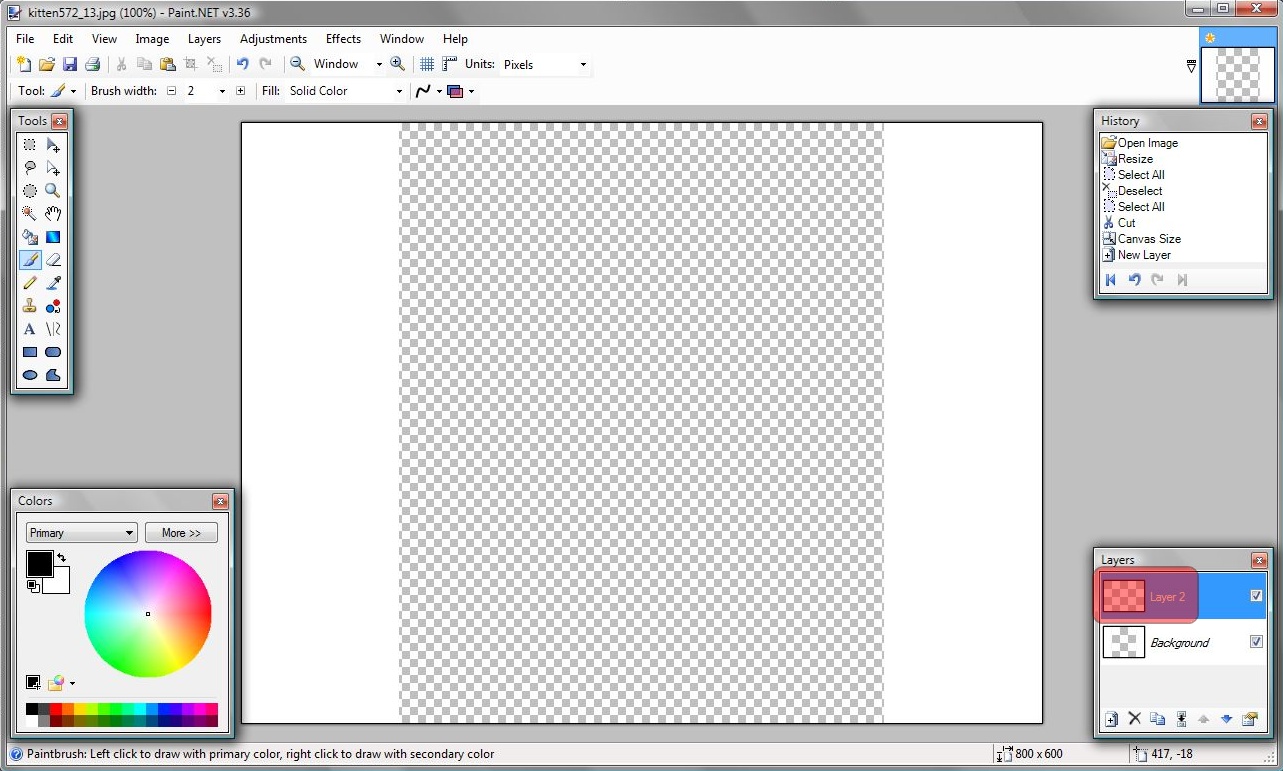
10) For greater ease and control in constructing the caption, it is best to separate the content into individual layers. At the menu bar, click Layers to display the drop-down menu. From the list, click Add New Layer. |
11) In the Layers toolbox, a new Layer 2 will have been added to the list above the original Background layer. The list of layers in the toolbox are arranged from top to bottom. This means that in the canvas workarea, upper layers are displayed over (or, "in front of") the lower layers. In this example caption, Layer 2 is displayed over the Background layer. Layer 2 is highlighted, indicating that it is also the current work layer. Changes made to this layer will not effect anything on another layer. In the Layers toolbox, double-click Layer 2 from the layer list. |
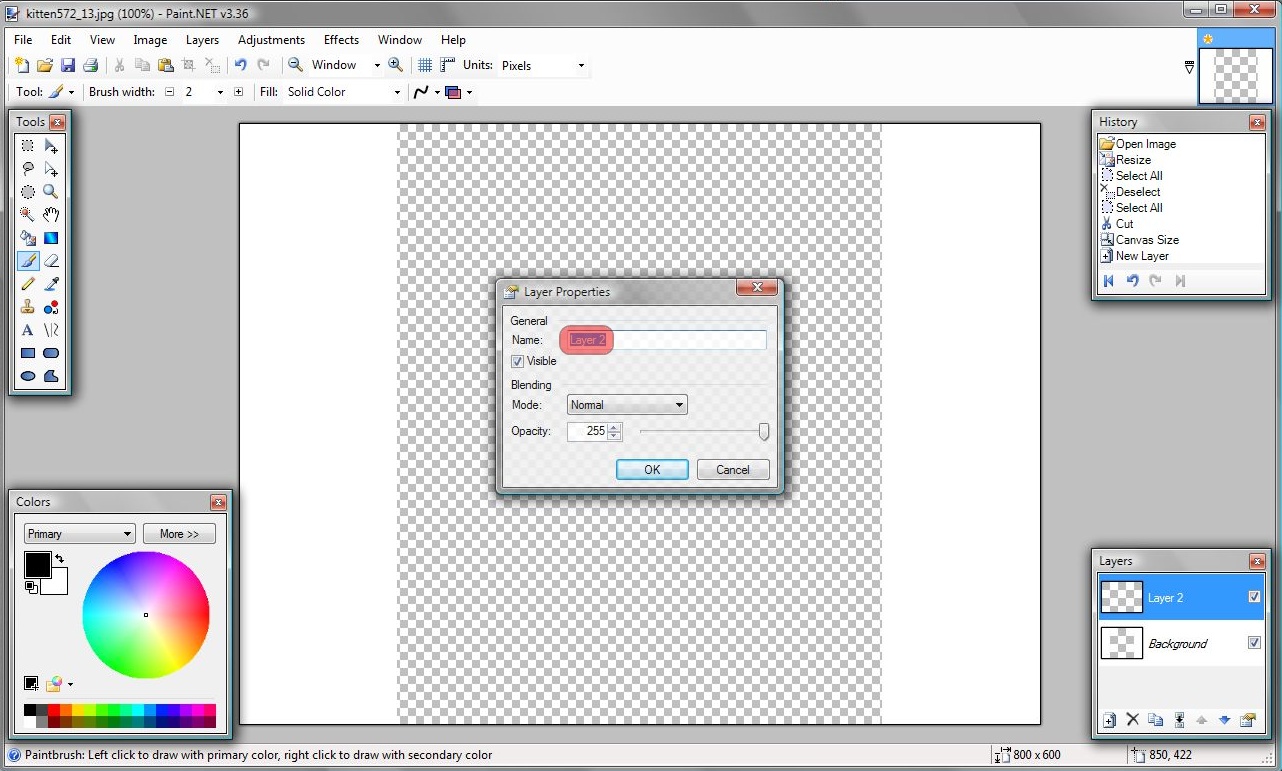
12) At the Layer Properties window, in the Name: field, the current name Layer 2 is highlighted. Type Pictures as the new layer name, and then click OK. |
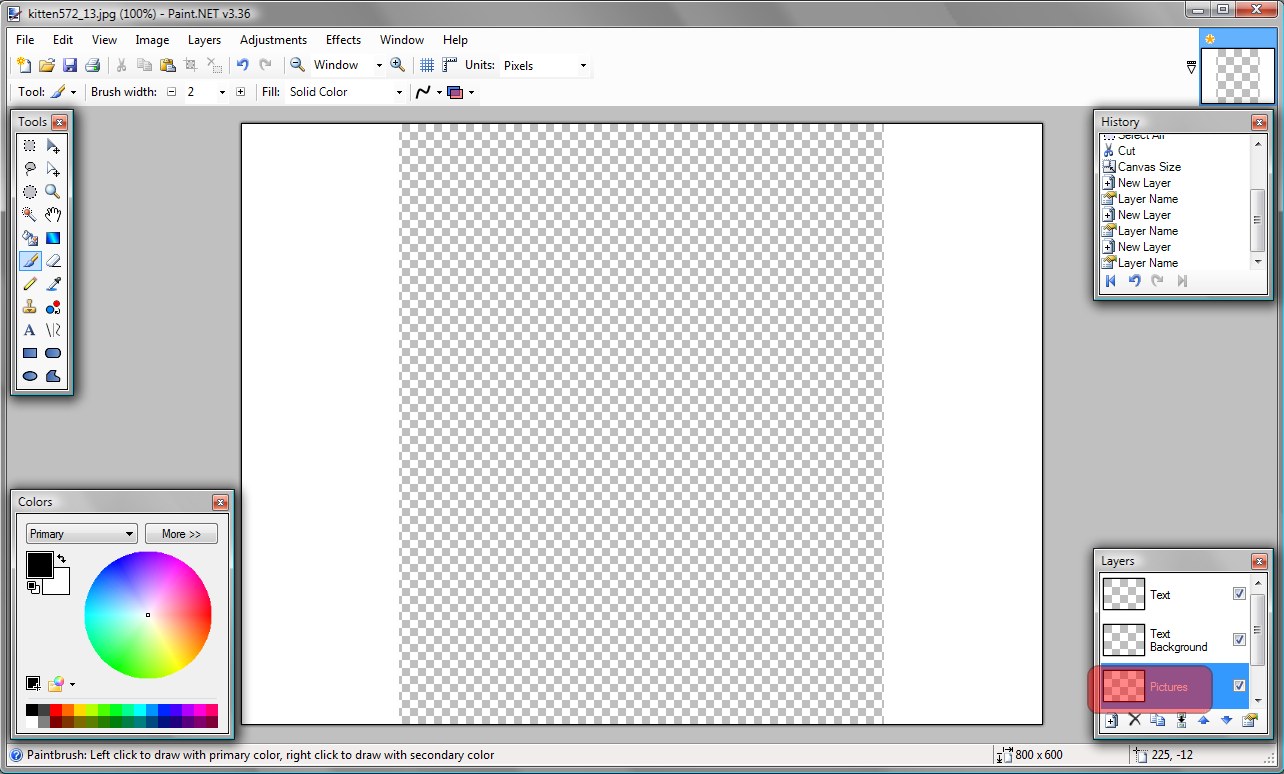
13) Repeat steps 11 and 12 to create another layer, and name it Text Background. |
 |
 |
 |
14) Repeat steps 11 and 12 to create another layer, and name it Text. |
15) In the Layers toolbox, click the Pictures layer to select it. |
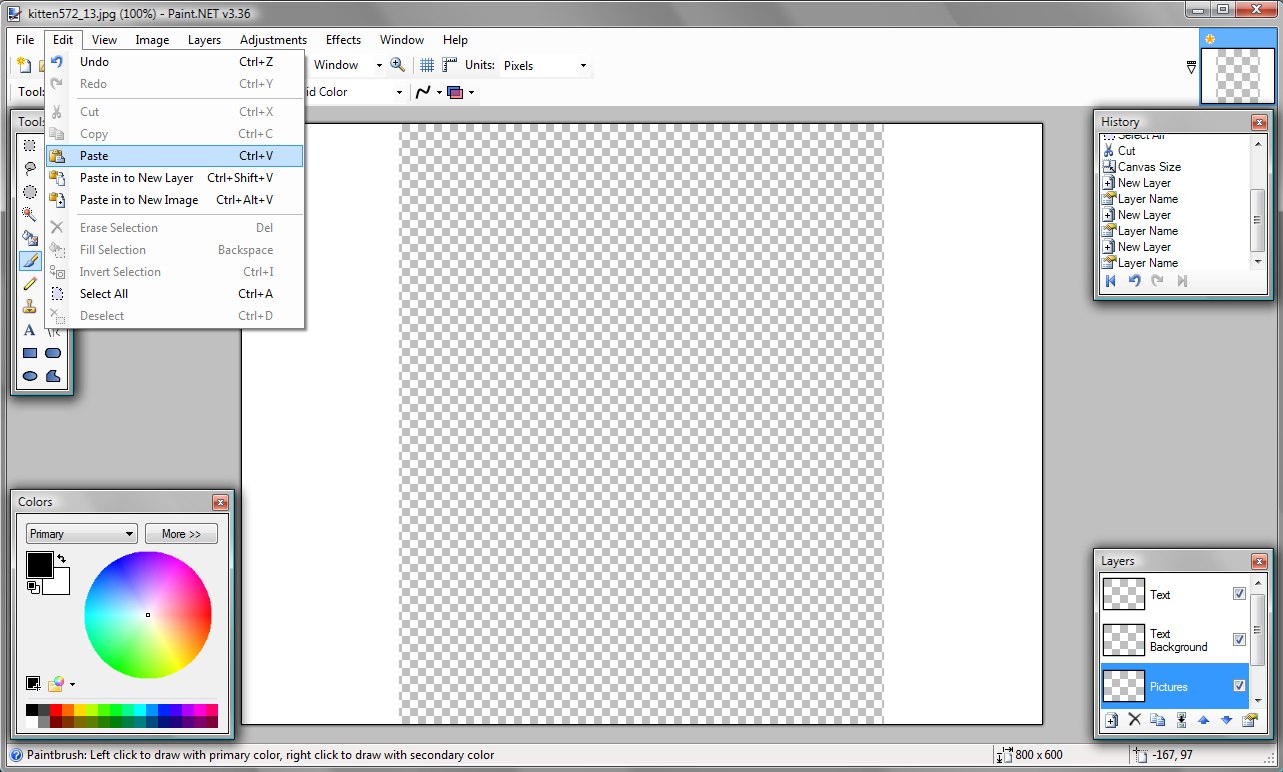
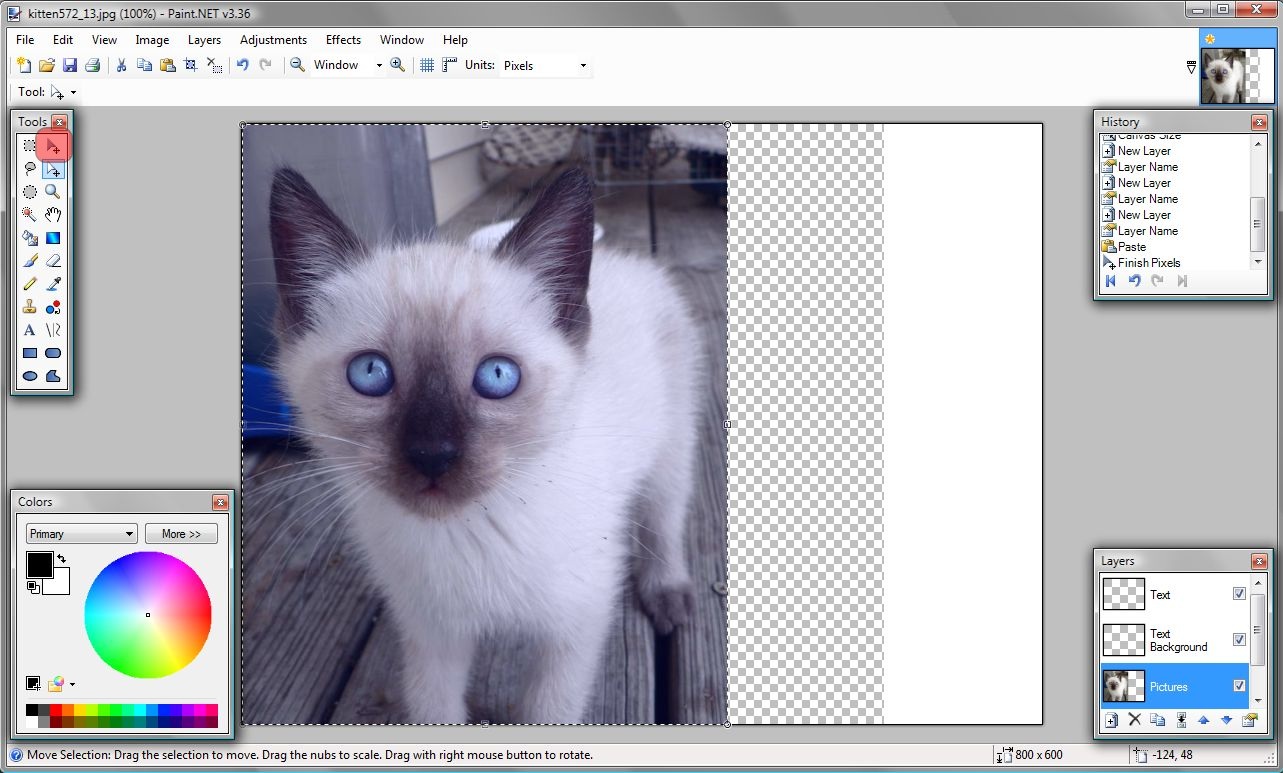
16) At the menu bar, click Edit to display the drop-down menu. From the list, click Paste. The resized image of the kitten will appear on the canvas and will be bounded by the selected indicator (the animated dashed line). |
17) In this example caption, the main caption text will appear in a column along the left, necessitating the movement of the kitten image. In the Tools toolbox, click the grey arrow (the Move Selected Pixels tool). |
 |
 |
 |
 |
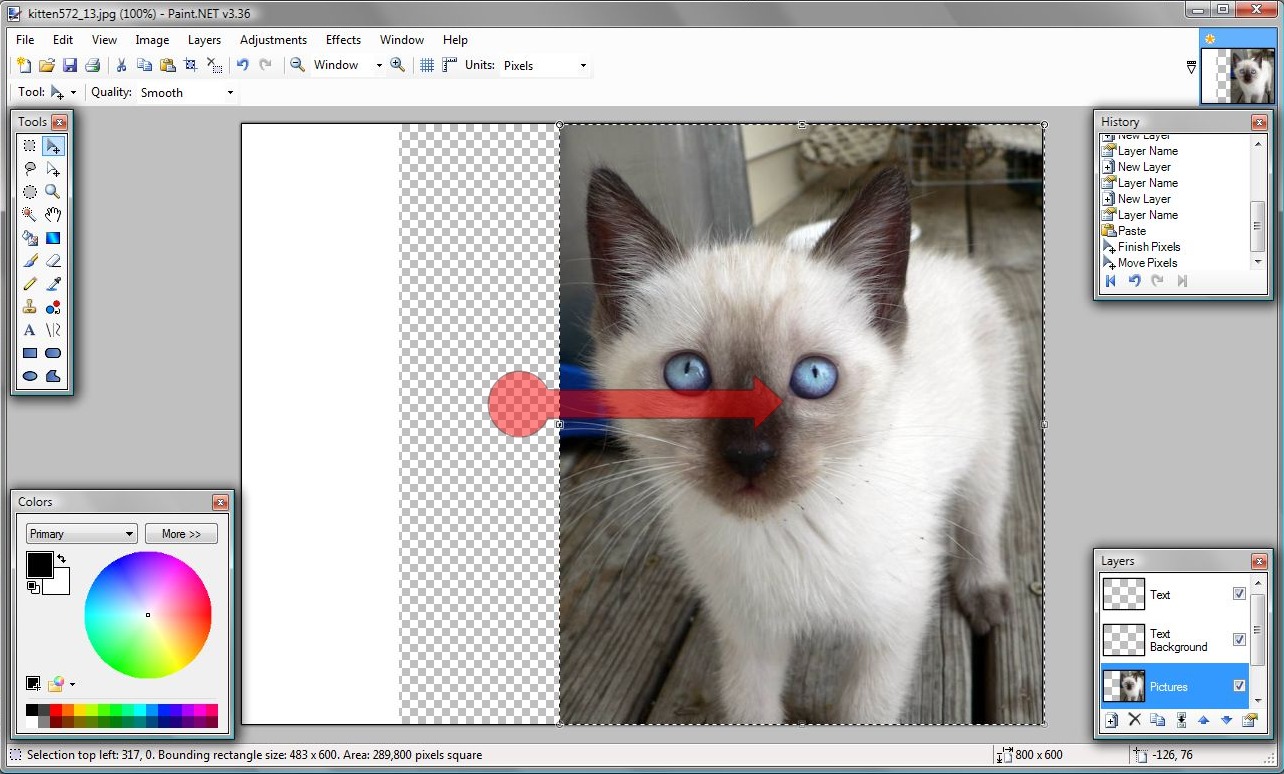
18) Position the mouse pointer over the selected kitten image. Click the left mouse button and hold it down to "grab" the image. Next, move the mouse to the right to drag the image to the new desired position. When satisfied with the image's new position, release the left mouse button to leave it. |
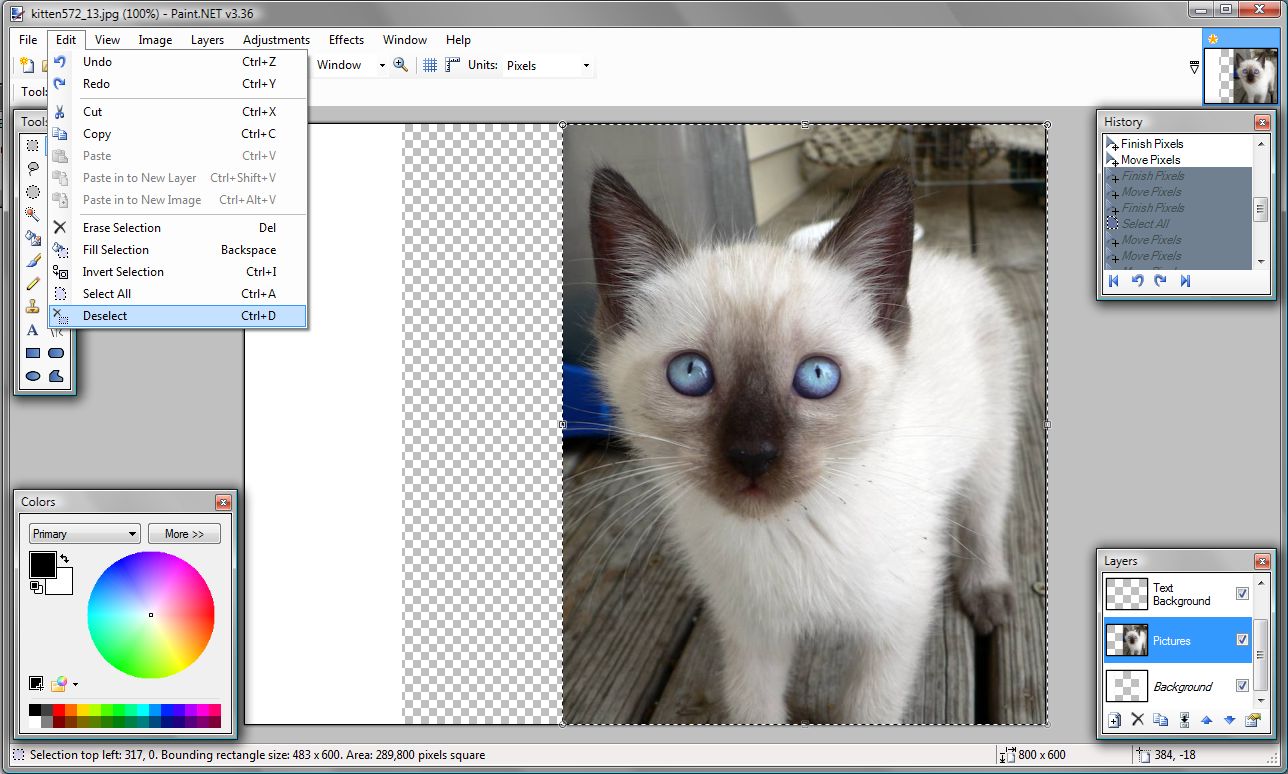
19) At the menu bar, click Edit to display the drop-down menu. From the list, click Deselect. |
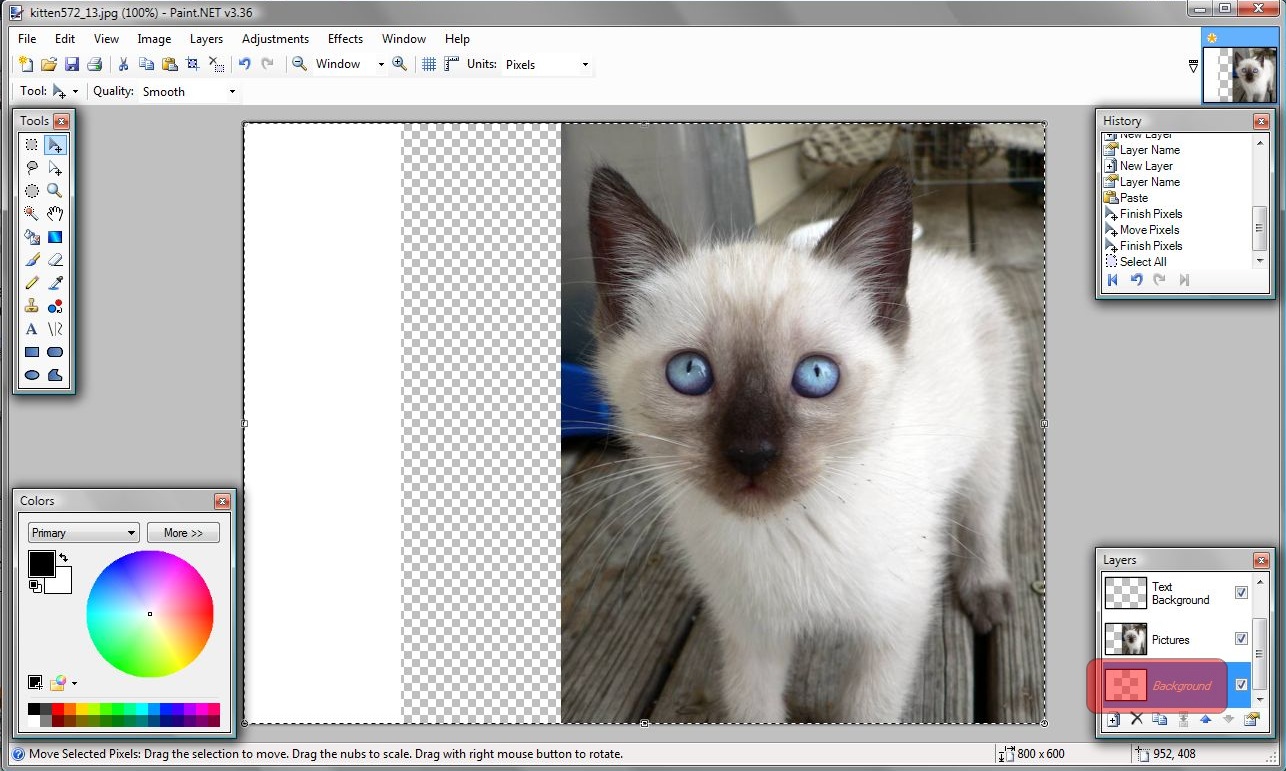
20) In the Layers toolbox, click the Background layer to select it. |
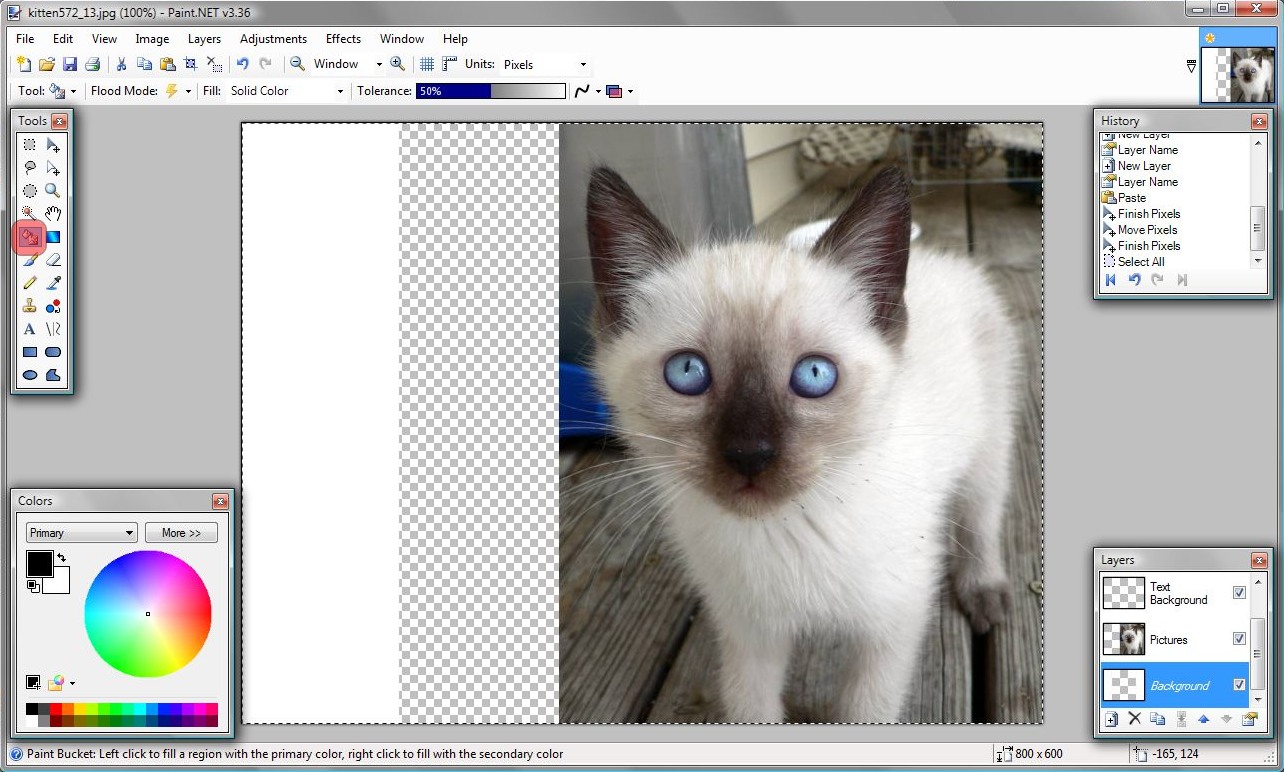
21) In the Tools toolbox, click the Paint Bucket. |
 |
 |
 |
 |
22) In the Colors toolbox, the Primary color selection is Black by default. In this example cap, Black is fine as a background for the caption text. However, another color may be selected (from either the A) Color Wheel or the B) Default Color Palette boxes) by clicking it with the mouse pointer. For optimal readability, either select a very dark background for the caption text and a very light color for the actual caption text ~ OR ~ very light background for the caption text and a very dark color for the actual caption text. |
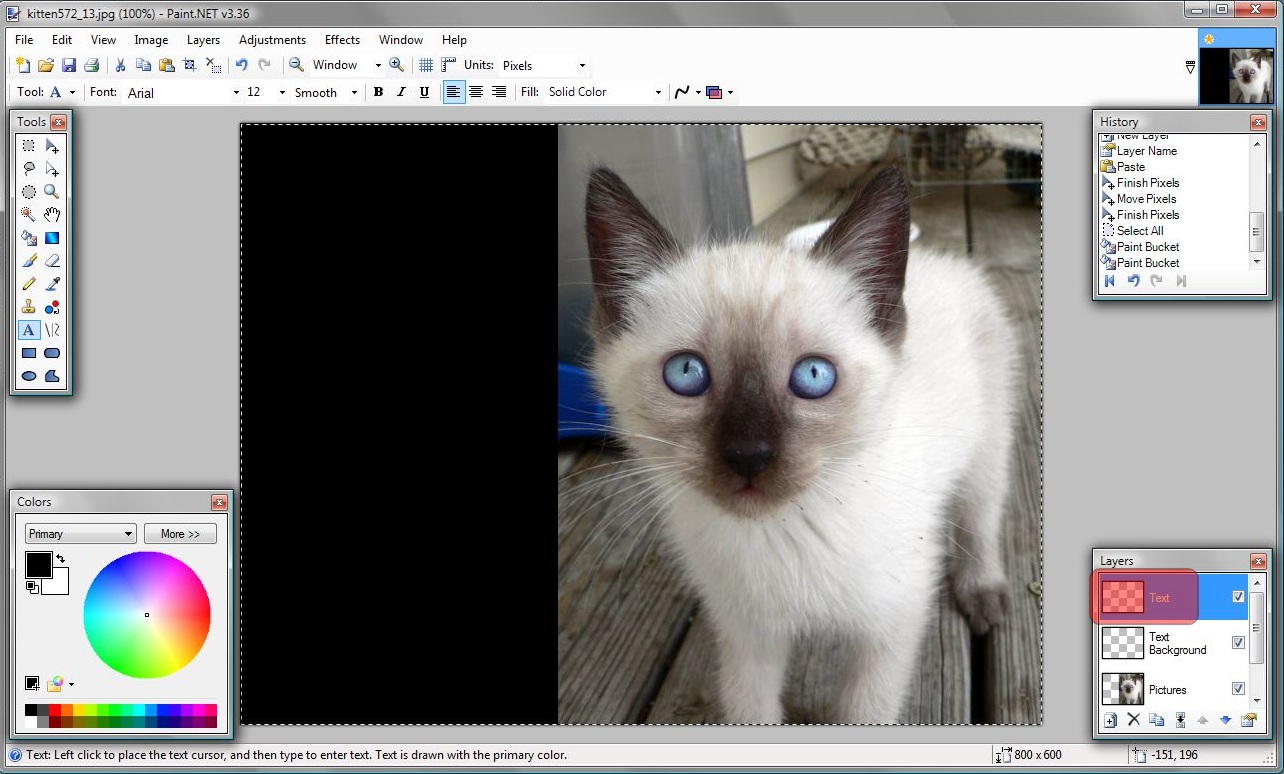
23) Move the mouse pointer over the empty area of the canvas. Once the pointer crosshairs are over the desired area, left click the mouse to fill in the area with the desired color. |
24) Repeat step 23 as necessary to fill in all remaining areas. |
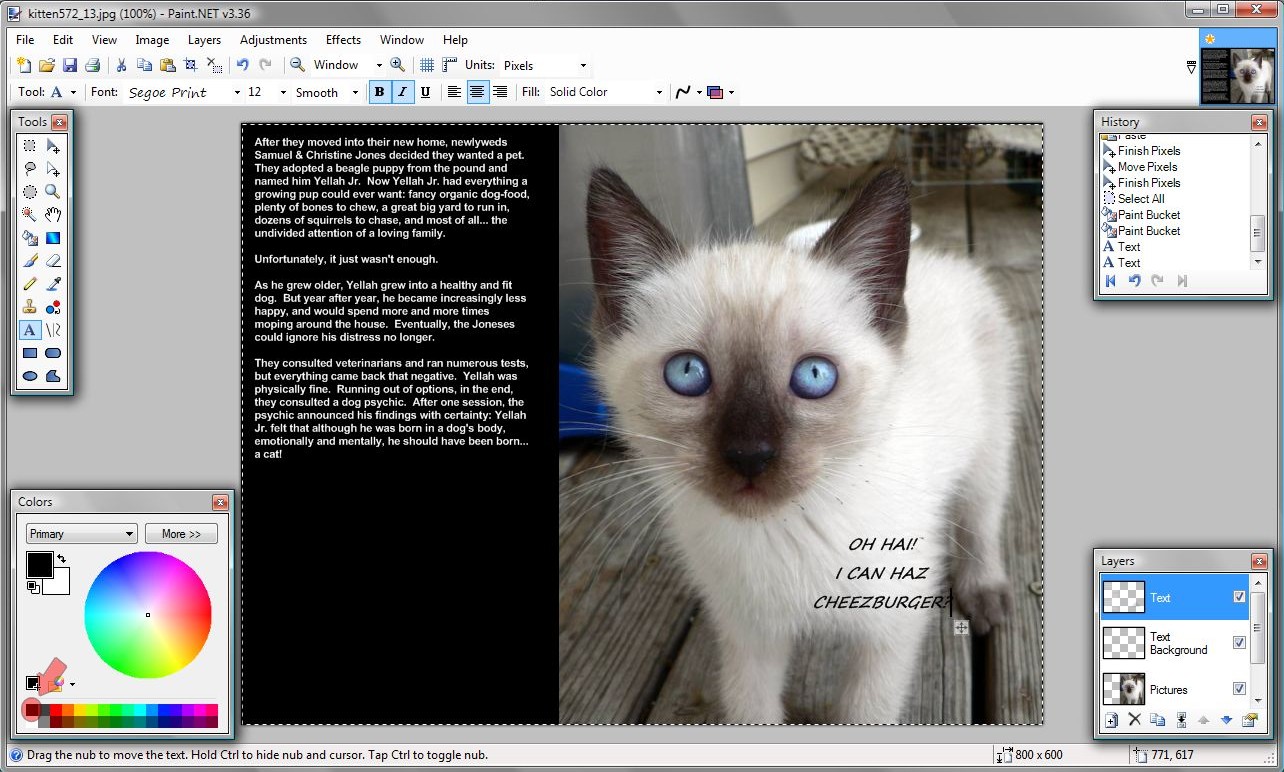
25) In the Layers toolbox, click the Text layer to make it the active layer. |
 |
 |
 |
 |
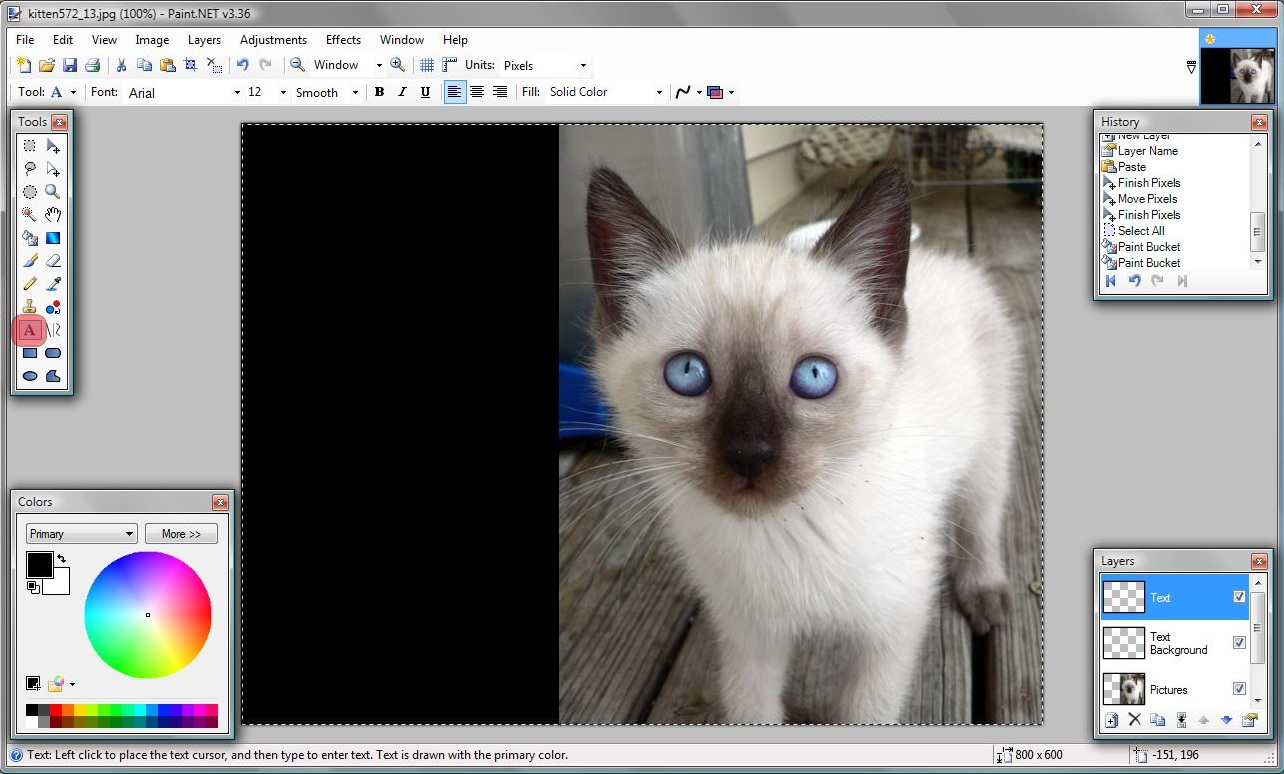
26) In the Tools toolbox, click the Capital A (the "Text" tool). |
27) Since the background for the text is Black, the caption text will be made White In the Colors toolbox, click the White color box from the Default Color Palette boxes. |
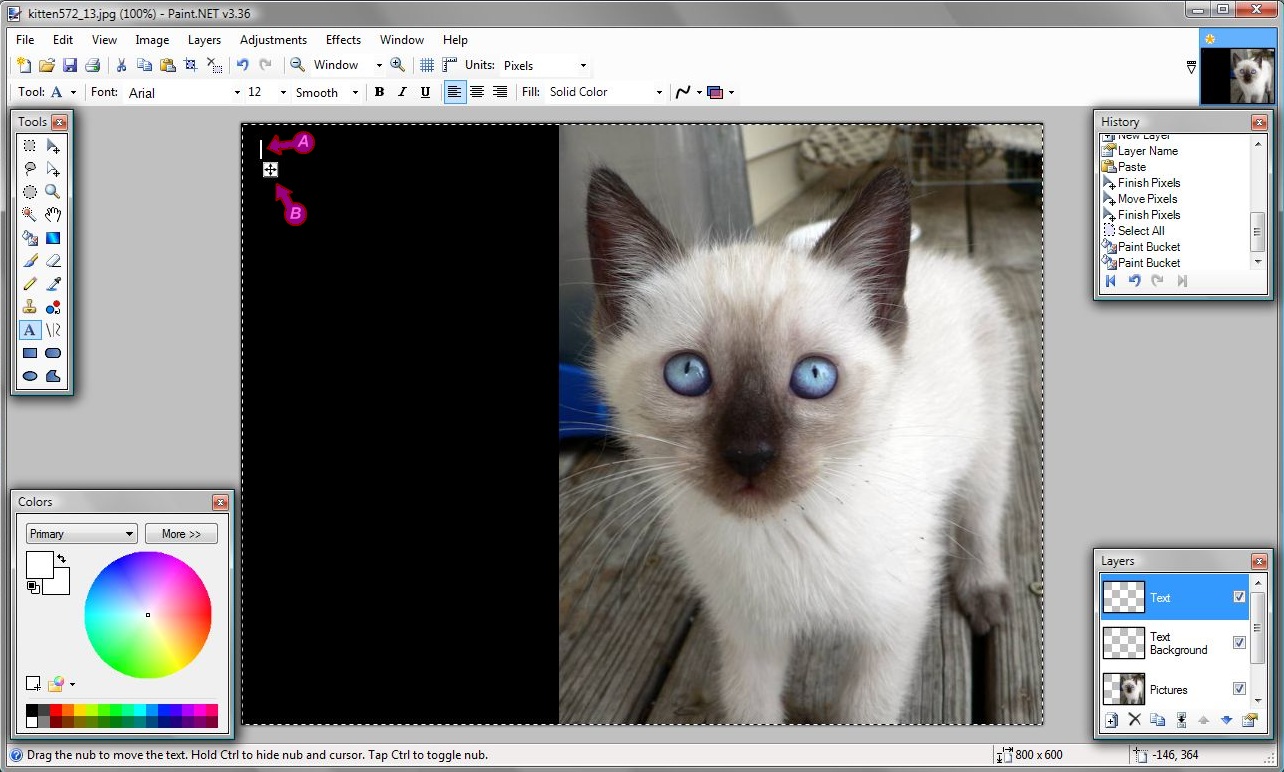
28) The pointer will now look like a flashing text cursor A) with a small position box beneath it. Move the pointer over the black background and left-click to set the starting text position. The onscreen text position can be adjusted by left-clicking the position box B), holding the button down, moving the pointer until the text is in the desired position, and then releasing the button. |
29) Continue entering the remaining text. Press the Enter key to drop down to another line. The text properties can be further modified by selecting them from the Text menu bar at the top of the program window, such as the A) Font Name and B) Size, C) Emphasis (Bold, Italics, Underline), D) Text Alignment, etc. For more than a few lines of text, it may be easier to Copy-&-Paste the text in from a text editor program. |
If you are satisfied with this format, then you are essentially finished. Feel free to jump ahead to step 38 to prepare your caption for uploading to the Web or sending via an email. |
 |
 |
 |
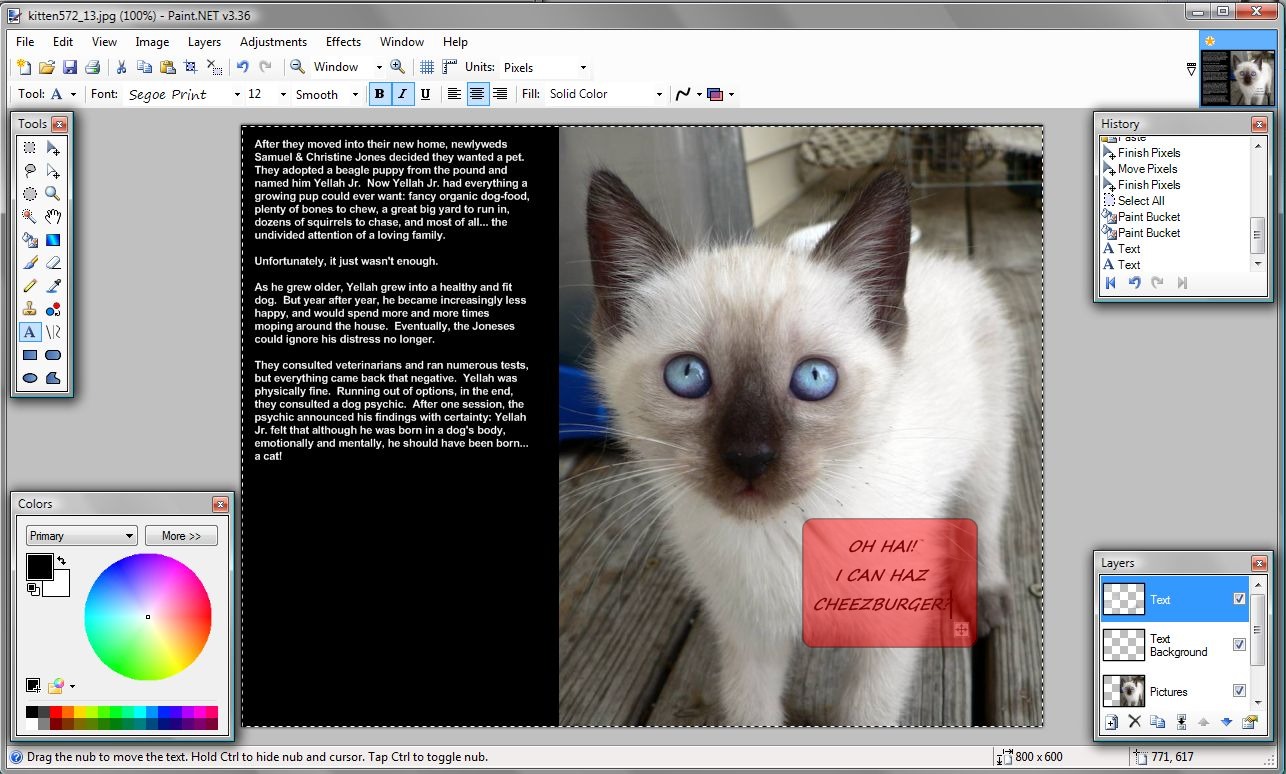
If you prefer, you can also have your caption text "float" over the image, similar in style to a more "comic book-ish" layout. The following optional steps will demonstrate how to create a simple "thought balloon" for the kitten. You can quickly adapt these steps to also create "speech balloons," floating blocks of "narration", or more dynamic titles. |
30) Since the text in this thought balloon will have a light background, click the Black color box from the Default Color Palette boxes. |
31) As in steps 28 and 29 previously, select a location above the kitten image and enter some appropriate text. Remember, the text is on a separate layer from the kitten image; if a mistake is made, it can be easily erased without affecting the image on the layer beneath it. |
32) In the Layers toolbox, click the Text Background layer to make it the active layer. |
 |
 |
 |
 |
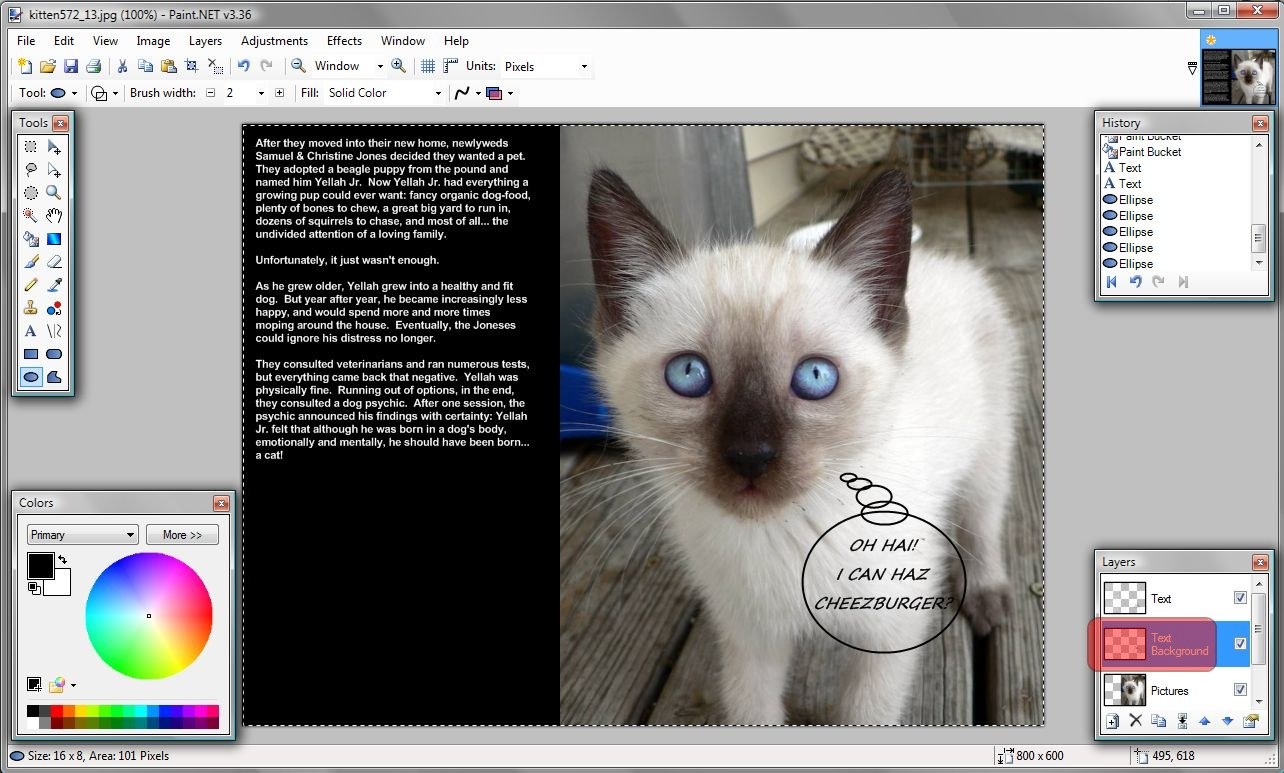
34) Next, in the Tools toolbox, click the blue filled circle (the "Ellipse" tool). |
35) The pointer will now look like a small crosshairs with a small circle in the upper right corner. Move the pointer over the black background and left-click and hold the button to set the starting corner of the ellipse. Slowly drag the ellipse to encircle the text. Once you have the ellipse in the proper place, release the mouse button. |
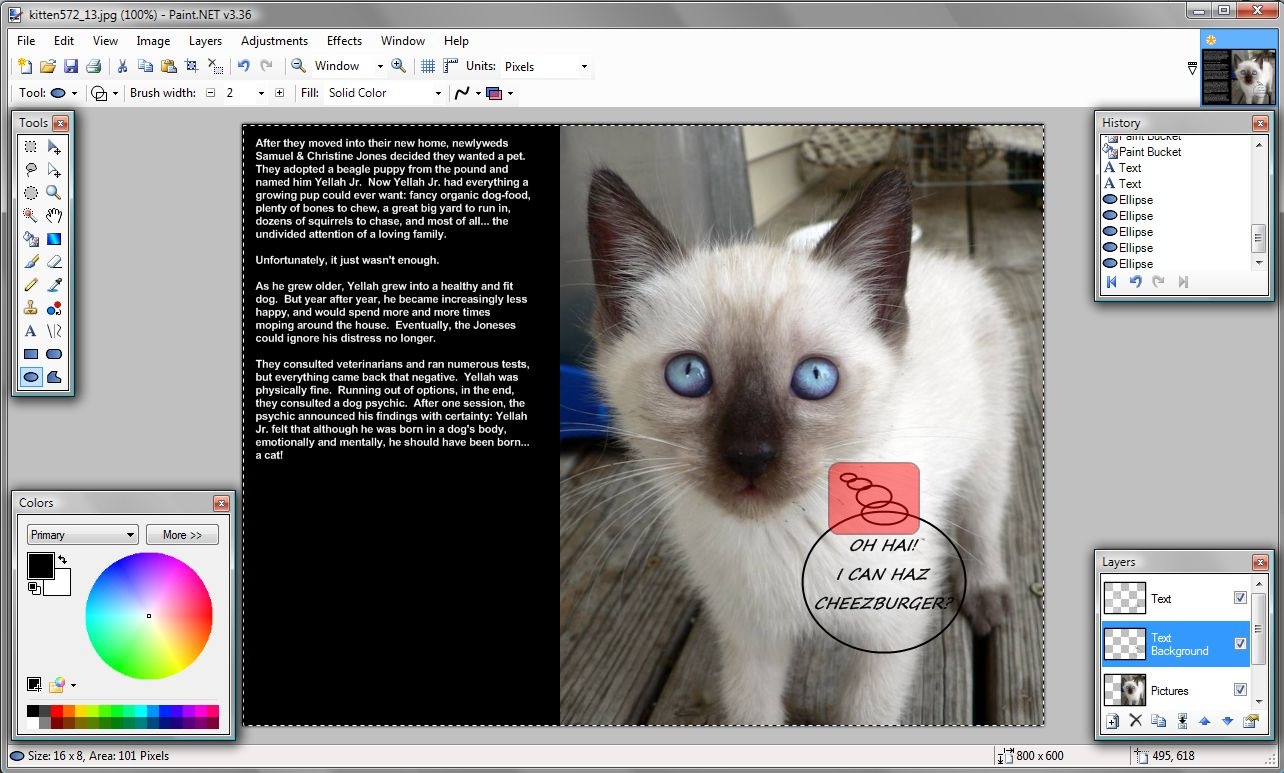
36) Starting at the large ellipse, draw a series of increasingly smaller ellipses toward the kitten's mouth/head. |
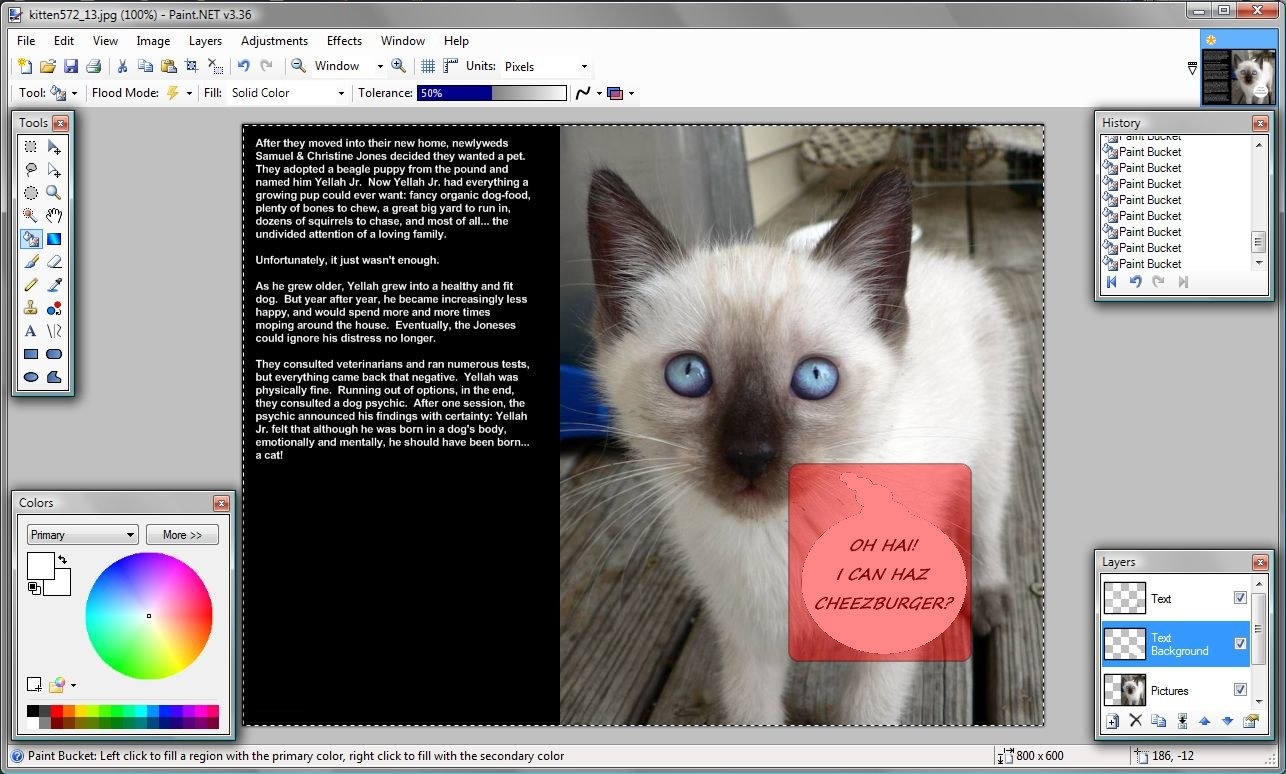
37) As previously in steps 23 and 24, use the Paint Bucket tool to fill in the ellipses. By clicking the black ellipse outline, you can erase the individual ellipse outlines with white. |
 |
 |
 |
 |
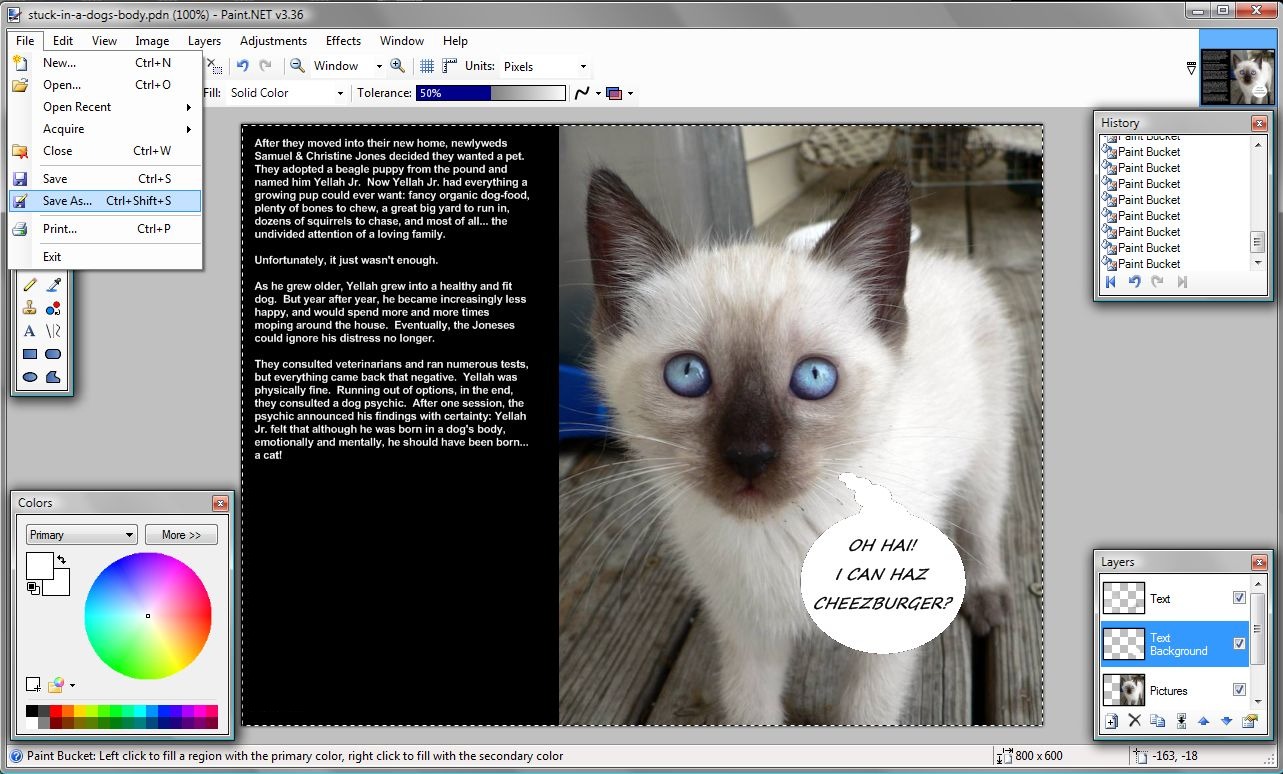
38) At the menu bar, click File to display the drop-down menu. From the list, click Save As.... |
39) In the Save As window, type a name in the File name: field. Next, from the Save as type drop-down menu, select the JPEG option and then click Save. |
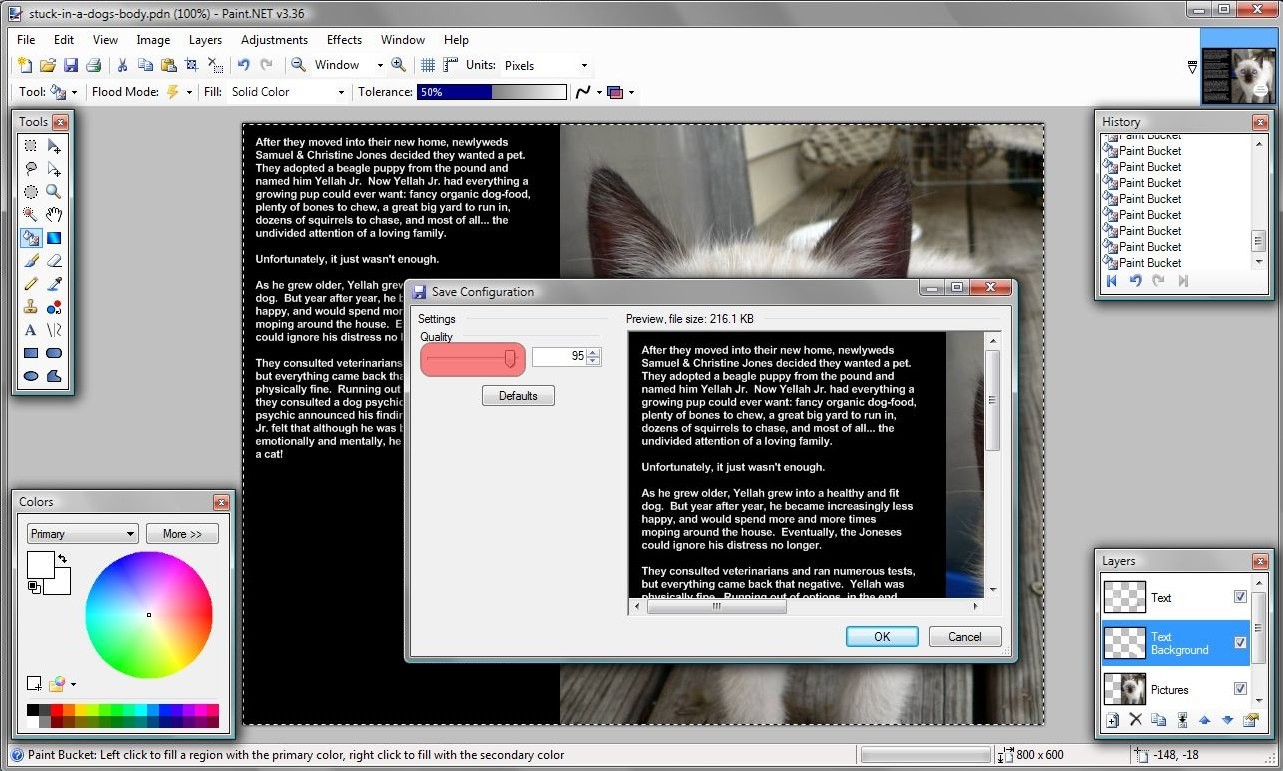
40) At the Save Configuration window, the Quality slider can be adjusted left or right to increase or decrease the JPEG compression. The current quality value is fine, so click OK. |
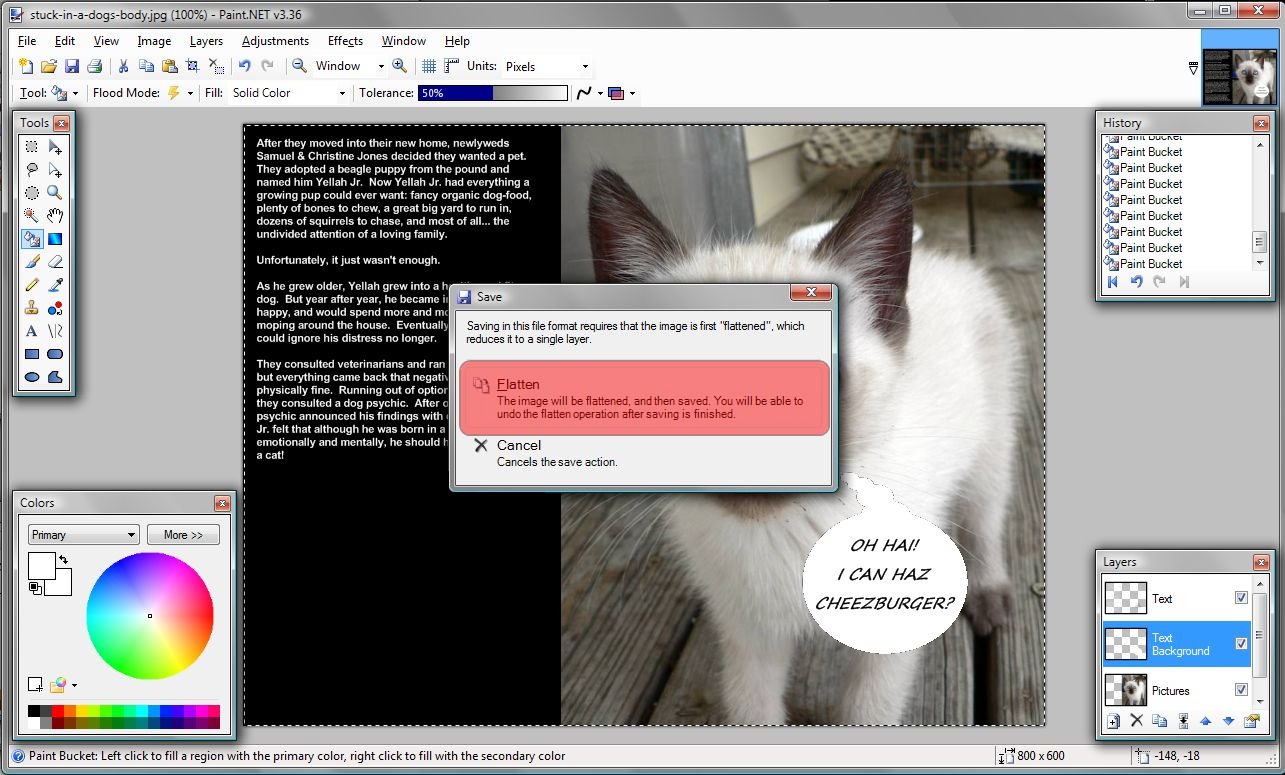
41) At the Save option box, click Flatten to complete the conversion to JPG. |
And that's it! To view a final, slightly "tweaked" version of this example caption, click here. Paint.NET has a wealth of intermediate and advanced features, so feel free to explore them as the time permits. Just remember to save your work often and don't be afraid to make mistakes. Additional Tips: 1) Using Layers to separate different content will allow one part to be changed or erased (for example, the caption text) without effecting the rest (the images, the thought/word balloons, or the background. 2) The History toolbox will allow you to backtrack step by step and undo a single or multiple changes. If you find you prefer some or all of those changes, you can move forward through the history and re-apply those changes again. |
|||